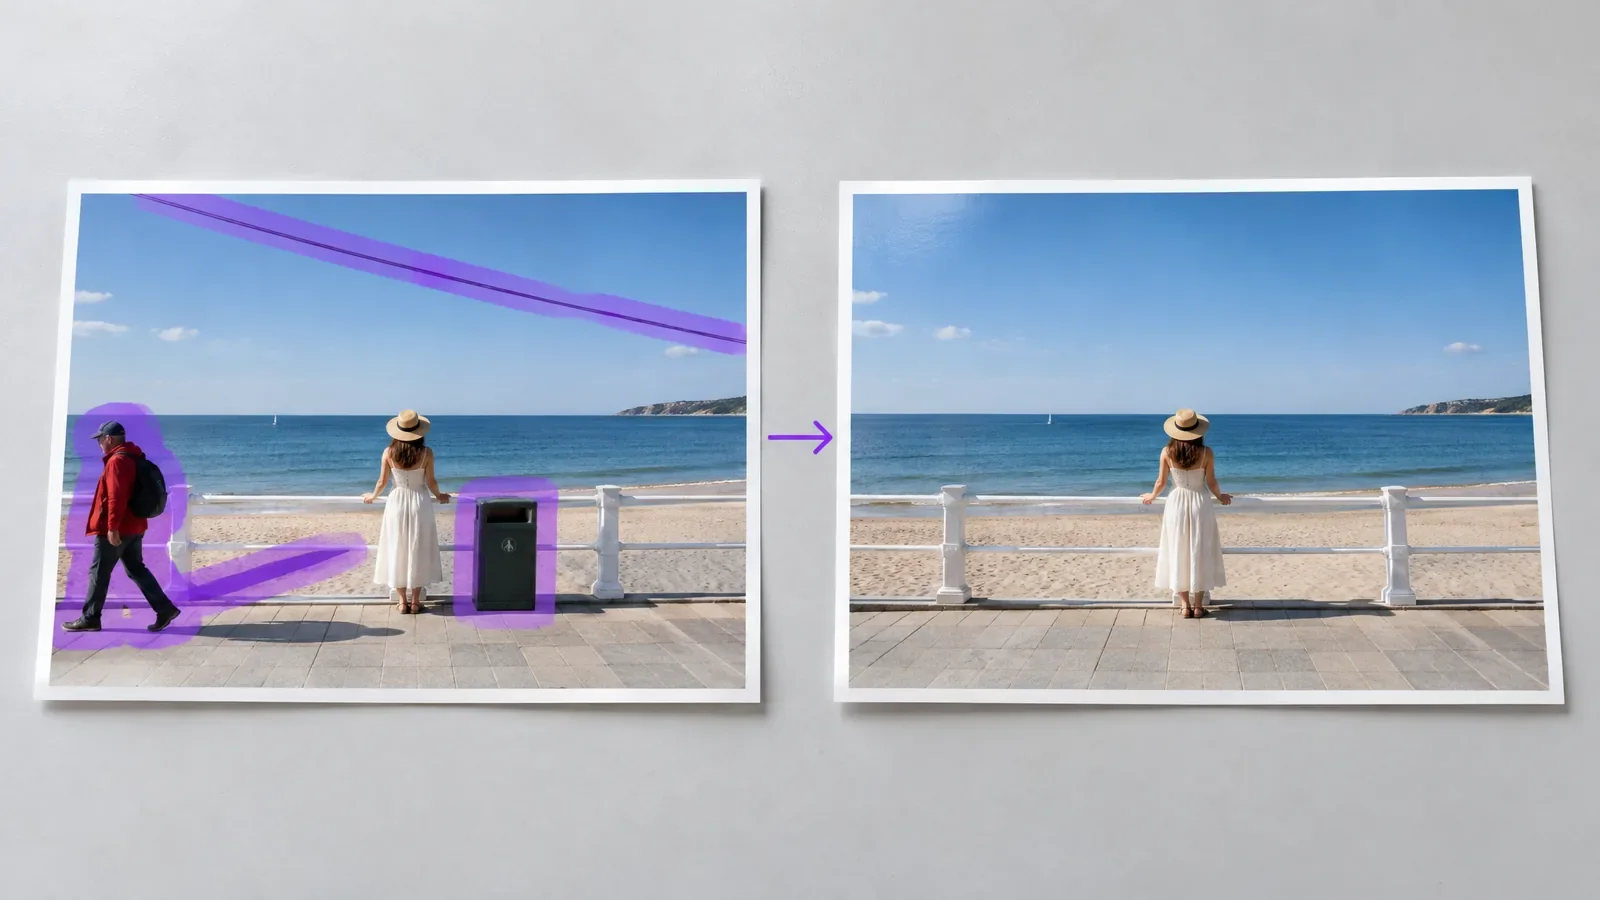
A stranger walked into your shot. A sign sits right behind your subject. A power line cuts across the sky. You can fix all of it without Photoshop. Here is how to remove an object from a photo using the MagicShot AI object remover: upload the photo, paint over the thing you want gone, and let the tool fill in the background. The app estimates about ten seconds for the result.
What you need before you start
A MagicShot account, signed in.
A photo with something in it you want to remove.
A steady hand with your mouse or finger. You will be painting a mask.
Step 1: Open the Object Remover
Open the AI Object Remover in the MagicShot app. On the left you will see Add your photo. Pick one from your library or upload a new one.
Step 2: Paint over the object
Once the photo loads, draw over whatever you want removed. This paint is called a mask. It tells the tool which pixels to replace. The app's own instructions are simple: draw over what you want removed, then confirm the mask.
Two habits make the result cleaner:
Cover the whole object, plus a little margin. If the mask stops right at the edge, you can get a faint outline or a leftover shadow.
Include the shadow. A removed person with their shadow still on the sand looks wrong straight away.
Step 3: Confirm and generate
The model is set to Magic Clean, marked recommended. The Generate button shows the credit cost first. At the time of writing it showed 95 credits. Click it, and the tool erases the object and fills the gap with a natural-looking background.
Step 4: Check the result, then download or share
Zoom in on the area you edited. Look at straight lines like horizons, railings and tile edges, because those are the first things to look off when a background is rebuilt. If it looks right, download it or send it to the community gallery.
When it works best, and when it does not
Object removal does best when the background around the object is simple or repetitive: sand, sky, grass, a plain wall. It has a harder time when the object sits in front of fine detail, like text, a face or a patterned fabric, because the tool has to invent something plausible. In those cases, try a tighter mask, or remove the object in two smaller passes.
Common things people remove
Strangers walking through a travel or event photo.
Signs, bins and cables that clutter an otherwise clean scene.
A phone, cup or bag that ended up in a portrait.
Blemishes or stray marks on a product shot.
Use it on your own photos, or on images you have permission to edit. Removing a watermark or credit from someone else's work is not what this tool is for.
Why not just crop?
Cropping works when the object is near the edge and you can spare the space. It fails when the object sits in the middle, or when cropping would ruin the composition. Object removal keeps the original framing and rebuilds what was behind the object, so the photo stays the same size.
How to remove an object from a photo with a busy background
Busy backgrounds: work in two or three small passes instead of one large mask, and check each result before moving on.
Objects that overlap your subject: keep the mask tight along the subject's edge so the tool does not eat into them.
Straight lines: if a horizon or railing now looks bent, redo only that area with a slightly different mask.
Troubleshooting
There is a ghost or outline where the object was
Your mask was too tight. Run it again with a slightly bigger mask that includes the shadow.
The fill looks smeared
Remove the object in smaller sections instead of one big mask, and re-run the area that looks off.
I want to take out the whole background, not one object
That is a different job. Use the background remover instead. If the object is a person behind your subject, this guide on removing people from the background of a photo goes deeper.
The workflow is short: add the photo, paint a generous mask, generate, inspect. Try it on a throwaway snapshot first, then use the AI object remover on the photo you actually care about.