How to unblur a photo depends on what caused the blur in the first place. Camera shake, a missed focus point, and a small file stretched too large all look similar at a glance, but they need different fixes. This guide covers the three causes, what an AI unblur tool can realistically recover, and a step-by-step walkthrough using MagicShot's image editor.
Want every method in one place? Read our complete guide on how to unblur an image with AI.
The Three Types of Blur
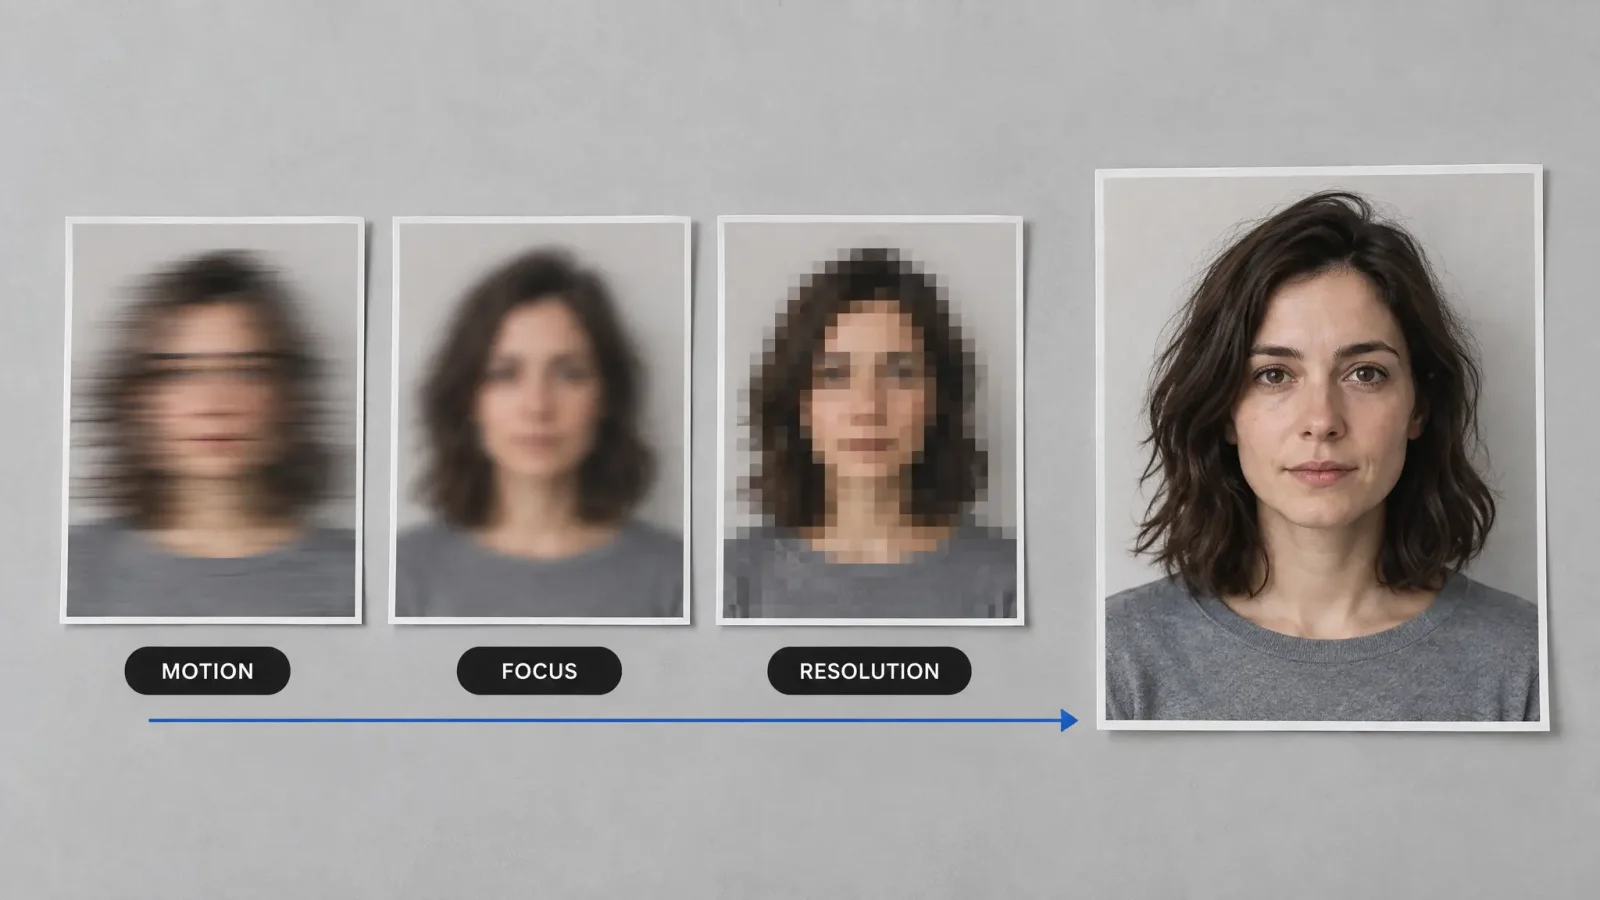
Most blurry photos fall into one of three categories, and knowing which one you have changes what to expect from any unblur image tool.
Motion blur. The camera or the subject moved during the exposure. It shows up as streaking in one direction, most common in low light where the shutter stays open longer.
Focus blur. Autofocus locked onto the wrong point, or the shot was taken just outside the lens's focus range. The whole frame looks evenly soft rather than streaked.
Resolution blur. A small photo, often a screenshot or an old phone photo, gets stretched or zoomed past its native size. Nothing moved. The file simply does not have enough pixel data for its new dimensions.
A photo can show more than one of these at once, especially anything sent through a messaging app that recompresses images on top of an existing focus issue.
What AI Unblurring Can Actually Fix
An AI unblur model is trained on huge sets of sharp and blurry image pairs. It learns what a sharp version of a given blur pattern probably looked like, then reconstructs plausible detail rather than literally recovering pixels that were never captured. That distinction matters for expectations, but in practice it handles a lot: moderate motion blur, soft focus, and low-resolution photos that were upscaled too far all respond well to this kind of processing, usually in one pass.
What It Can't Fix
Severe motion blur, where the subject is barely recognizable as a face or object, rarely comes back clean, because there is no usable pattern left to reconstruct from. The same goes for a photo that has already been compressed and re-saved multiple times, or a picture taken of a screen showing another blurry picture. In those cases, an unblur pass can improve the image somewhat, but it will not produce a result that looks like it was shot in focus.
How to Unblur an Image in MagicShot
Upload the blurry photo to MagicShot's image editor.
Select the enhance or restore option built for detail recovery, rather than a stylistic filter.
Generate the result and compare it against the original at full zoom, checking eyes, text, and edges first since those show blur most clearly.
Download the fixed version, or run it again if the first pass under-corrected.
For a phone screenshot or a photo forwarded through a messaging app, the resolution-blur case above, this step usually recovers noticeably more detail than a manual sharpen filter, because it is not just boosting contrast on already-soft edges.
Unblur vs Sharpen: Not the Same Fix
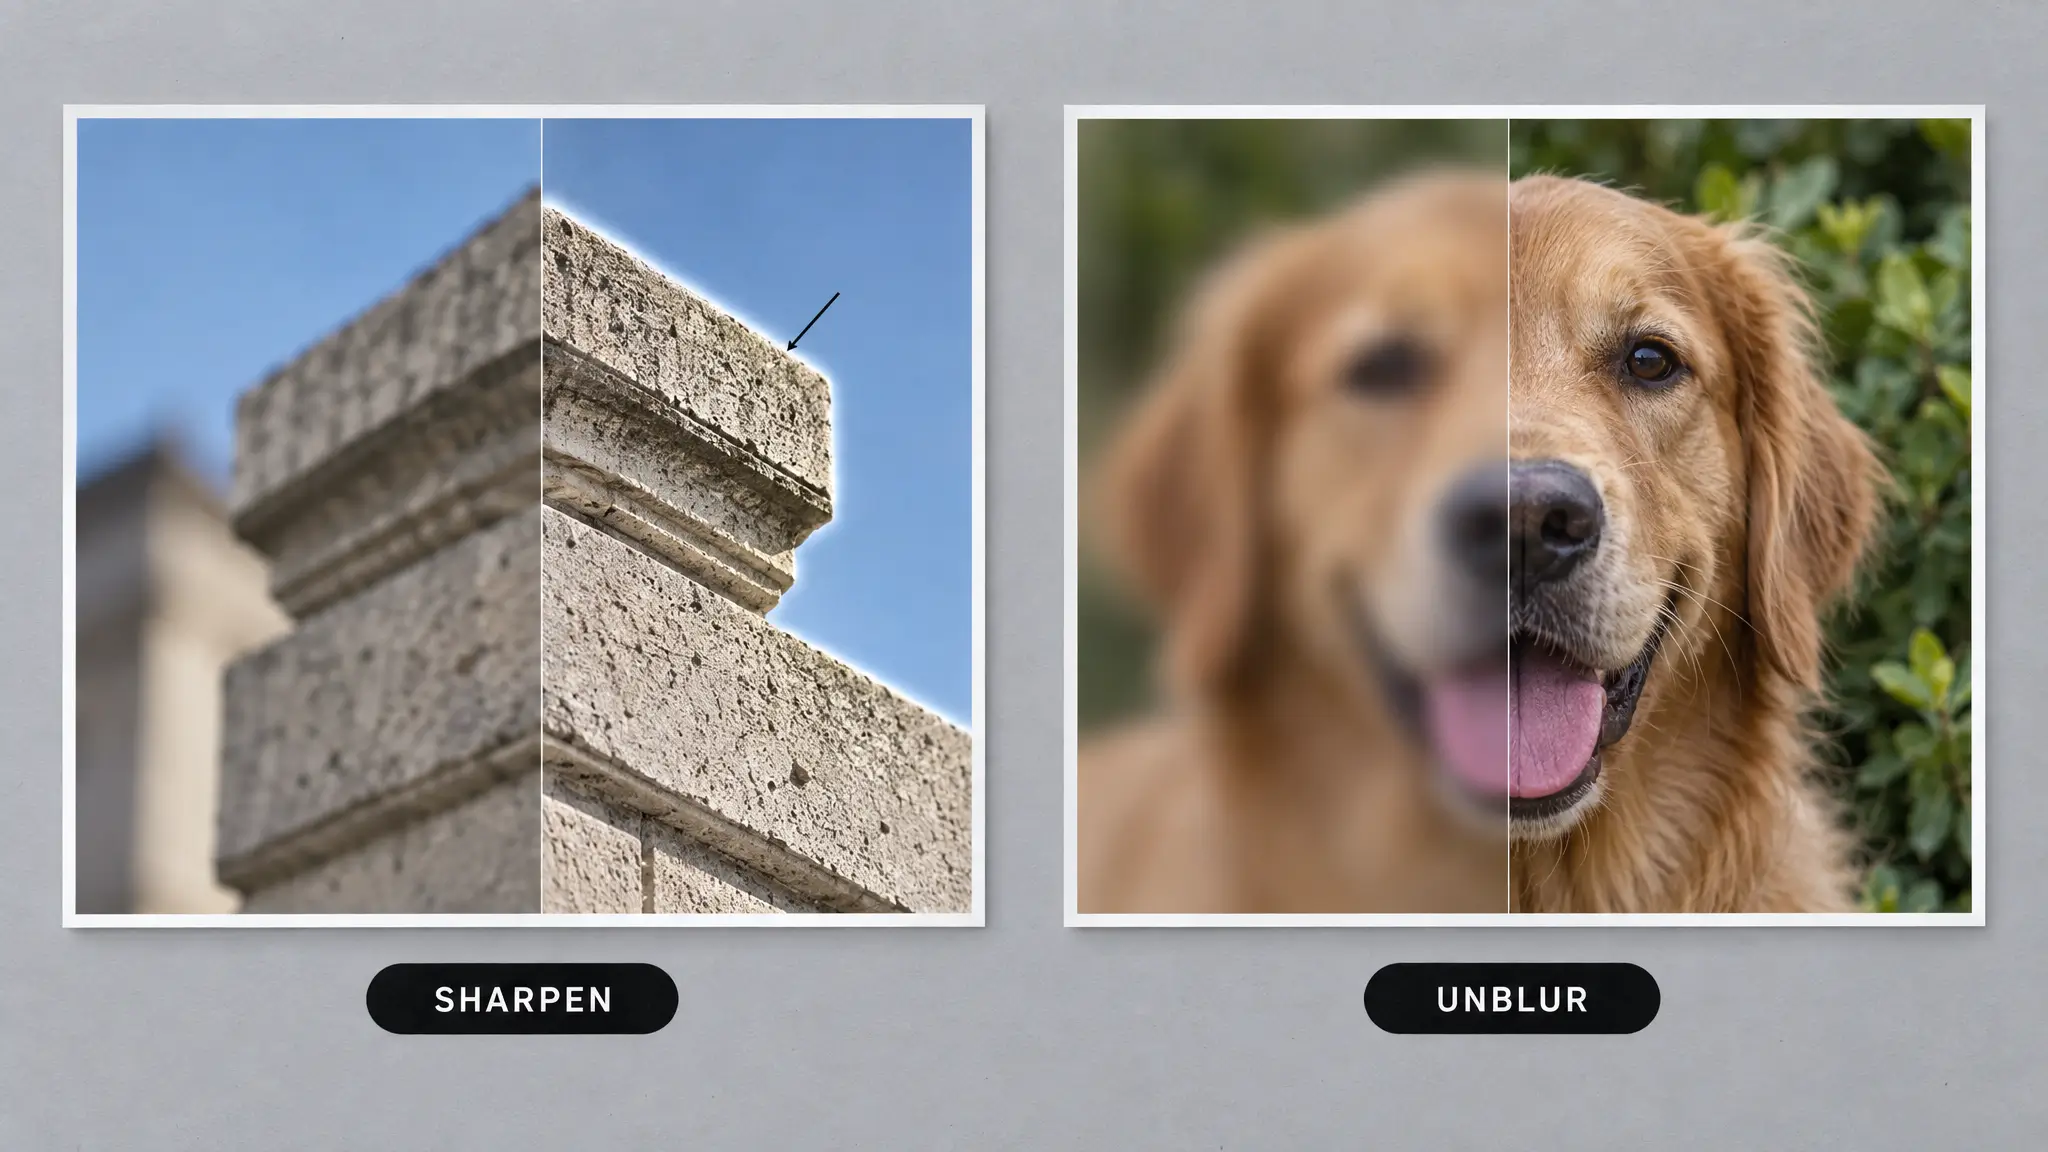
Unblurring and sharpening solve different problems, and mixing them up is the most common reason people are disappointed with a result. Sharpening increases contrast along existing edges in a photo that already has real detail, just slightly soft. Unblurring reconstructs detail that looks genuinely missing. If you only need a crisper-looking subject with a soft background left alone, the process in Blur vs Sharpen: Blurring a Background or Sharpening a Face in One Photo covers that specific combination.
Read Next
More from this cluster:
How to Fix Pixelated Photos (And Why It Happens) covers the related but different problem of blocky, low-resolution images.
How to Deblur a Photo That's Too Far Gone for Photoshop goes deeper on motion blur that a manual sharpen filter cannot handle.