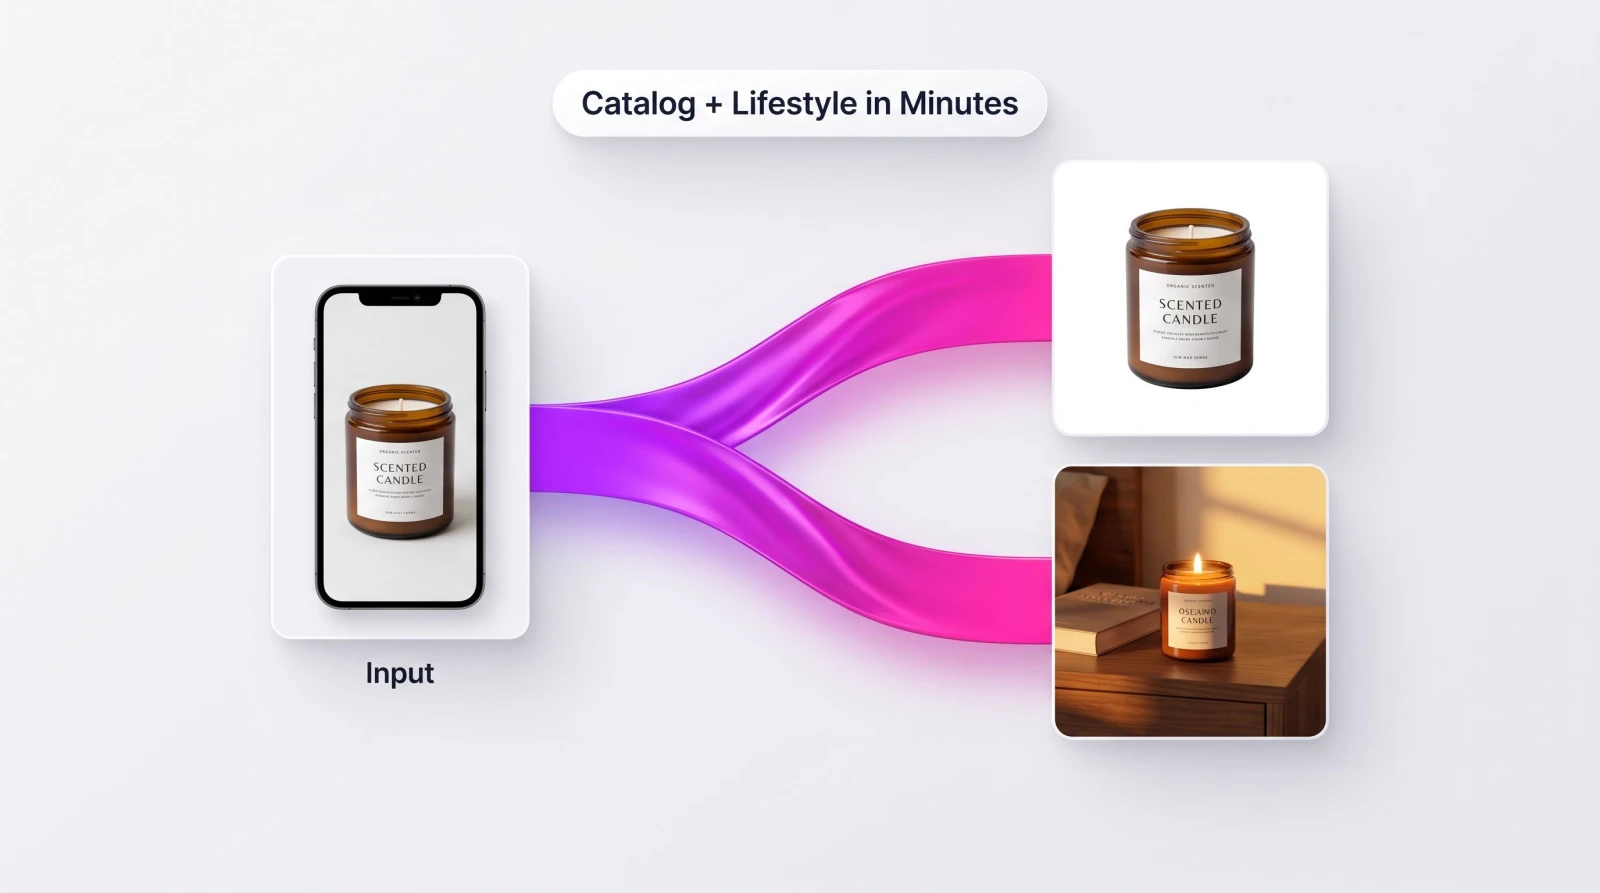
You have a product and a phone. What you do not have is a spare $400 for a studio session, a photographer on call, or a weekend to build a set. A product photo generator closes that gap. Upload one clear shot, pick a scene, and export listing-ready images in minutes instead of booking a shoot you cannot afford to repeat every time you launch something new.
This guide walks through the exact steps in MagicShot, so a solo seller and a ten-person brand team can both follow along and get the same result: clean white-background catalog frames and staged lifestyle shots, up to 4K, ready for your store, ads, and feed.
What you will achieve and what you need
By the end you will have a set of on-brand product images built from a single source photo: crisp catalog cutouts for your listings and warmer lifestyle scenes for ads and social. No reshoot, no rented backdrop, no waiting on a photographer's calendar.
Here is the short checklist before you start:
A MagicShot account so you can generate and download in high resolution.
One clear photo of your product. A phone camera is fine. Even light and a plain backdrop make everything downstream easier.
A rough idea of the scenes you want. A white catalog look, a desk setting, a kitchen counter, whatever fits where you will post.
That is it. Now to the steps.
Step 1: Upload your product
Open the Product Photo Generator and add one photo of your item. A phone shot works. You do not need a ring light or a photo studio backdrop, but a few habits pay off:
Shoot in even, diffuse light near a window rather than harsh overhead spots that cast hard shadows.
Use a plain backdrop so the tool can read the edges of your product cleanly. A white wall or a sheet of paper is plenty.
Fill the frame with the product and keep it in focus. The sharper your source, the better every generated scene looks.
If your original has a messy background or a stray object in the frame, clean it first with the Background Remover or the Object Remover, then upload the tidied version. Starting clean means fewer surprises when you generate.
One more thing on the source photo: shoot the angle you actually want to sell. If the front label is your selling point, photograph the front straight on. If the texture of a leather bag is the hook, get in close on the grain. The generator restages the product you give it, so the pose and angle in your upload set the tone for every frame that follows. A single well-composed phone photo beats five rushed ones taken in bad light.
Step 2: Choose the scene
This is where you decide what the shot says. You have two lanes, and most catalogs need both.
The white-background catalog look
Pick the plain white or neutral catalog style for the images that go on your product pages. Marketplaces like Amazon, Etsy, and Shopify reward a clean cutout on white because it loads fast and puts the product first. Use these for your primary listing image and your variant thumbnails.
The lifestyle setting
For ads and social, describe the scene in plain language. Be specific about surface, light, and mood. The more concrete the prompt, the more the result looks intentional rather than generic. For example:
"On a walnut desk, morning light, soft shadows."
Other prompts that work well:
"On a marble kitchen counter, bright daylight, a sprig of rosemary beside it."
"On a linen cloth, warm evening light, shallow depth of field."
"Held in a hand outdoors, blurred greenery behind, golden hour."
Name the surface, the time of day, and the shadow you want. Skip vague words like "nice" or "professional" and the tool has far more to work with. If you sell seasonal goods, this is the setting you will change most, and you can restage it in seconds whenever the calendar turns.
Match the scene to where it will live
A shot for an Etsy listing is not the same as a shot for a paid Instagram ad. For the marketplace, keep it clean and honest so the buyer sees exactly what arrives. For social, give the product a home: a candle on a nightstand next to a book reads warmer than the same candle on white. For a hero banner, leave breathing room around the product so your headline has somewhere to sit. Deciding the destination first saves you from generating twenty frames you cannot use.
Step 3: Generate the catalog and export in 4K
Run the generation. Review the frames, keep the ones that match your brand, and regenerate anything that misses. When you are happy, export high-resolution shots up to 4K so a single image can cover a lot of ground:
Listings: the white-background cutouts for product pages and thumbnails.
Ads: the lifestyle scenes cropped for Meta, Google, and TikTok placements.
Social: the same scenes resized for Instagram, Reels, and Pinterest.
Because the files are high-res, you can crop tight for a square ad or wide for a banner without the image falling apart. And when the season changes, you do not start over. Reopen the product, swap the prompt, and restage the whole set for the holidays, a summer push, or a new campaign.
A practical habit: name your files by product and scene as you download them, like "candle-white-front" and "candle-nightstand-warm." Ten SKUs turn into forty or fifty images fast, and a clear naming system saves you from digging when you are uploading a listing at 11pm. It also makes it easy to hand a folder to a teammate who knows exactly which file goes where.
Why a product photo generator works for small sellers and big teams alike
The value is not just "nice pictures." It is what the pictures replace.
If you are a solo seller or creator
You get a full catalog from one phone photo, which means you can list a new product the day it arrives instead of waiting on a studio slot. No photographer, no set, no reshoot fee every time a variant sells out and comes back in a new color. You control the look, and you ship faster than the competitor still booking a session.
If you are a growing brand or a small team
You get consistency across hundreds of SKUs and the speed to feed always-hungry ad channels. A marketer can restage a hero product for a Black Friday theme in the morning and hand finished 4K files to the media buyer by lunch. That is a workflow that used to need a producer, a studio, and a budget.
Once your stills are done, you can push them further inside MagicShot. Turn a product into a short clip with Product to Video for a paid social ad, or if a generated frame comes out slightly soft, sharpen it with the Image Upscaler before it goes live.
What it looks like across product types
Different categories reward different scenes, so it helps to see how the same three steps play out:
Skincare and beauty: a clean white cutout for the listing, plus a bathroom-shelf scene with soft morning light for social. Call out the color of the bottle and cap in your prompt so the shade stays true.
Home and kitchen: a mug or board looks flat on white but comes alive on a wooden counter with steam or a slice of fruit nearby. Name the surface and the prop.
Jewelry and small goods: shoot your source close and sharp, then generate a linen or velvet backdrop that flatters metal and stone without stealing focus.
Apparel and accessories: use a flat-lay style for catalog, and when you need the item shown worn, move to the AI Fashion Model tool for an on-body shot.
The pattern is the same every time: one clean upload, a catalog frame for the listing, a lifestyle frame for the feed. What changes is the surface, the light, and the prop you name in the prompt.
The real cost comparison
Line it up honestly. A traditional product shoot means a photographer's day rate, studio rental, props, and travel, easily a four-figure bill for a modest set. Then a variant launches and you do it again. Generating from a single photo turns that recurring cost into a repeatable workflow you run yourself, on your schedule. The math is not just cheaper. It is the difference between shipping product images the same week and waiting on a calendar you do not control.
Troubleshooting and next steps
A few fixes for the most common snags:
Edges look rough or the product is warped. Your source was likely low-contrast against its background. Reshoot on a plain backdrop with even light, or clean the cutout first, then regenerate.
Colors are off. Products with tricky finishes (glossy, transparent, metallic) can shift. Add the exact color to your prompt, for example "matte forest-green bottle," and pick the frame closest to real life.
The scene feels generic. Add one specific detail: a surface material, a light direction, a prop. "On a walnut desk, morning light" beats "on a table."
Text or logos on the product get distorted. Keep those frames simpler, favor the clean catalog look for close crops, and use the lifestyle scenes for wider shots where fine print matters less.
Next, build a small library. Generate three or four scenes per product so you always have fresh creative for a new ad or post without touching a camera again. When you are ready to expand your visual kit, restage the same product for a new campaign, or add a worn shot for apparel, you already have the workflow down.
Wrap-up
Three steps, one photo, a full catalog. Upload, choose the scene, export in 4K. Whether you are listing your first product or restaging a hundred SKUs for a new season, a product photo generator gives you the images you need on the day you need them, without the studio bill.