How to fix pixelated photos comes down to first figuring out why the photo turned blocky in the first place, since the fix depends on the cause. Most pixelation comes from one of three sources: a small file resized up past its native resolution, heavy compression from a messaging app, or a screenshot of an already-compressed image. This post covers all three and walks through fixing pixelated images with MagicShot's image editor.
Want the full step-by-step version? Read our complete guide on how to unpixelate an image.
Why Photos Go Pixelated
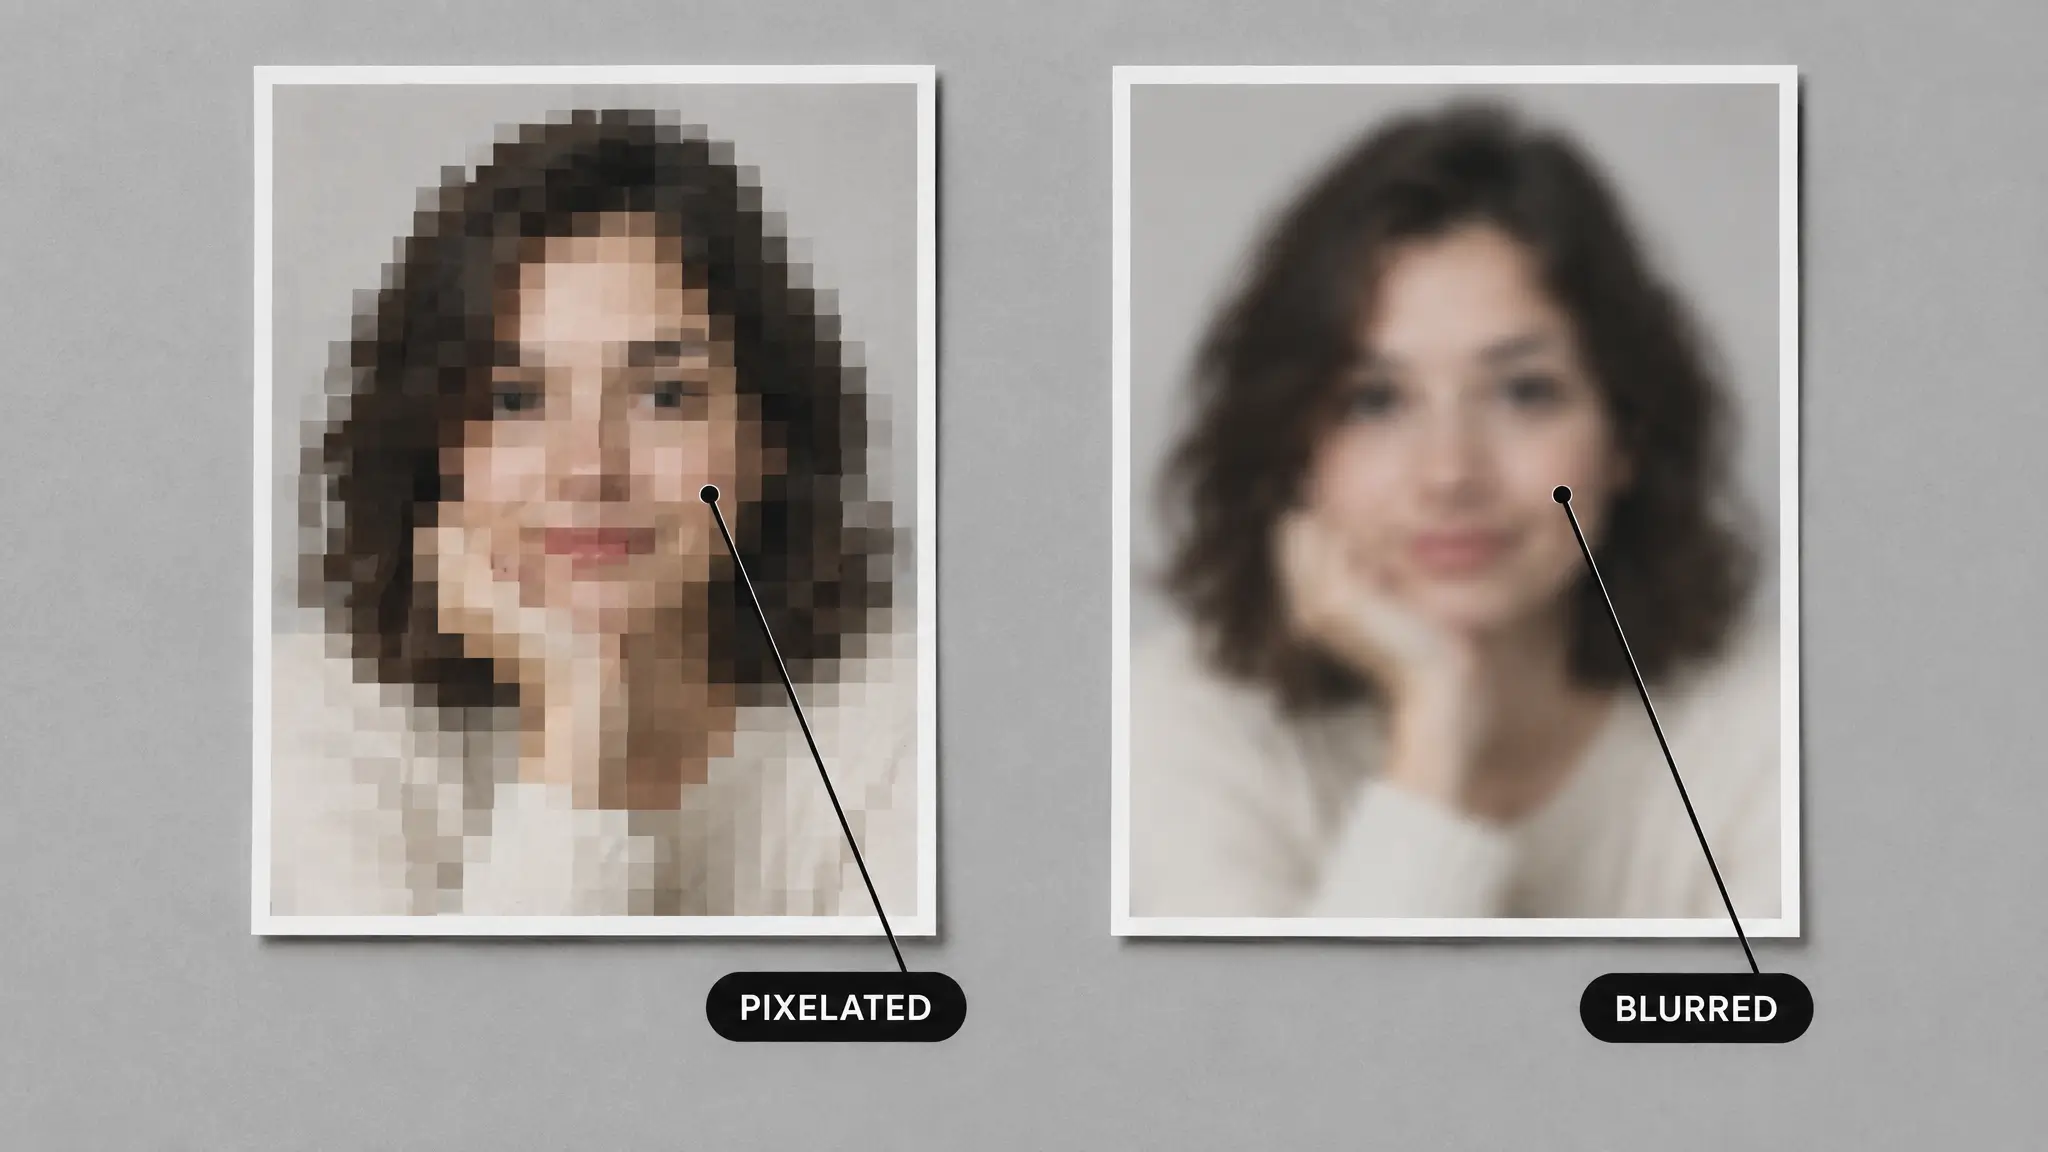
A photo is pixelated when individual square blocks of color become visible instead of smooth detail. That happens for a few specific reasons:
Upscaling past native resolution. A 400 by 400 pixel photo stretched to fill a 1200 by 1200 pixel space does not gain detail. It just makes the existing pixels bigger and more visible.
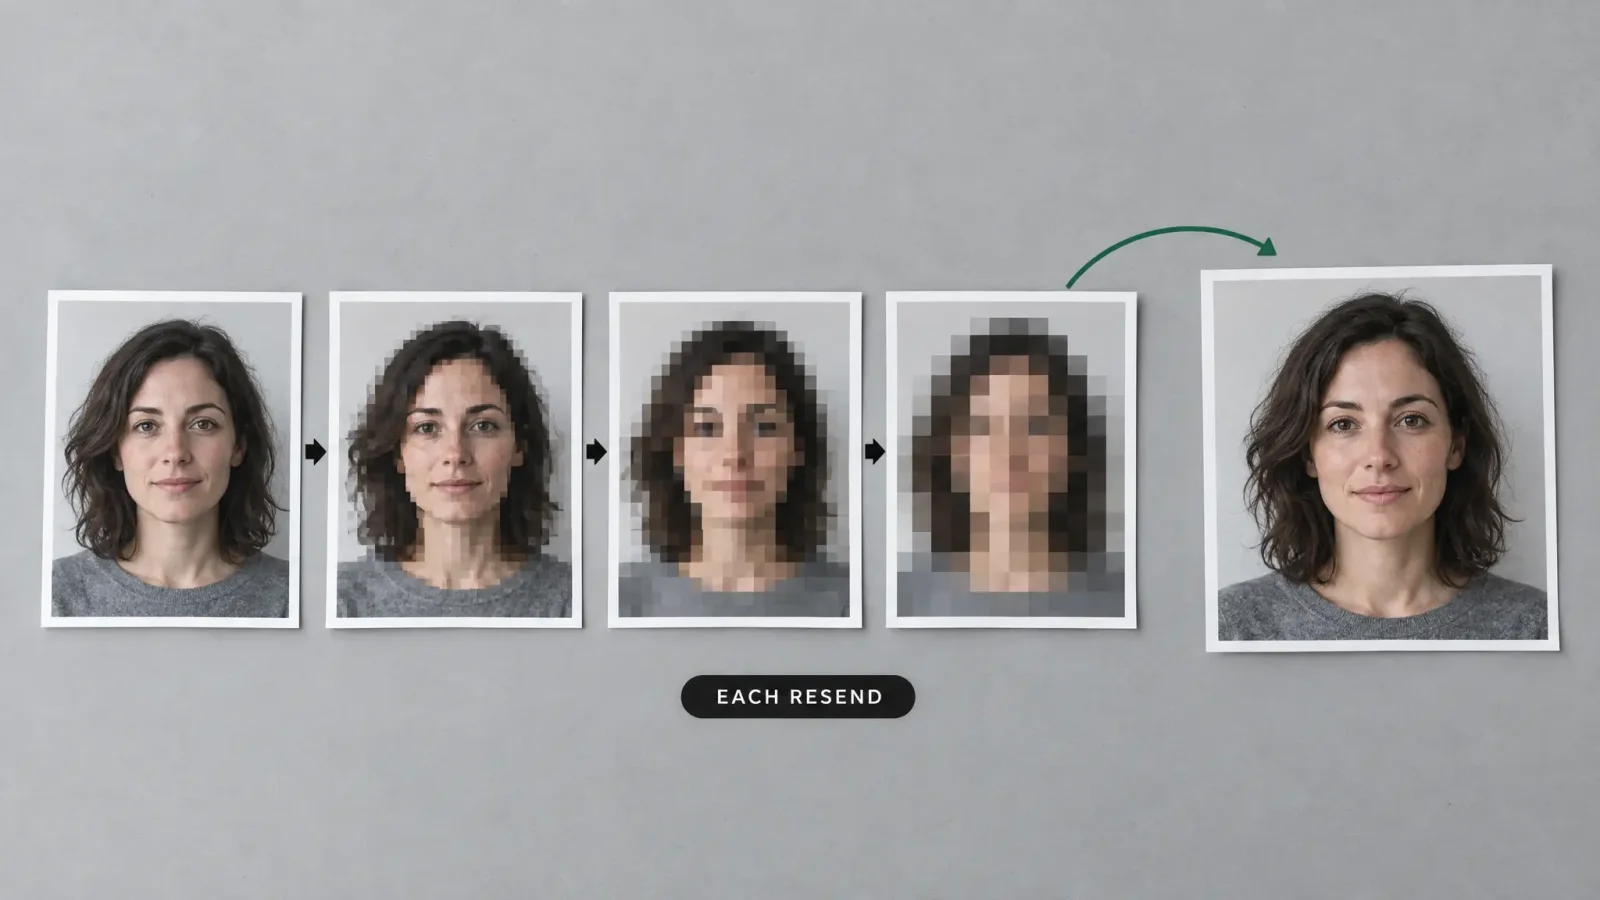
Messaging app compression. Apps like WhatsApp, iMessage, and most social platforms automatically shrink and recompress photos to save bandwidth. Each additional send through the app compounds the quality loss.
Screenshotting a screenshot. Taking a screenshot of an already-compressed image, then sending that screenshot again, stacks compression artifacts on top of each other.
This is the single most common real-world scenario behind the search: a photo looked fine on the sender's phone, then arrived pixelated after being sent over WhatsApp or a similar app, because the platform recompressed it in transit.
Whether a Heavily Pixelated Photo Can Be Fully Fixed
Not always, but it usually improves significantly. AI-based detail recovery reconstructs plausible texture and edges rather than literally restoring lost pixel data, which means a moderately pixelated photo, the kind that has been through one or two rounds of app compression, typically comes back looking close to the original. A photo that has been screenshotted and resent several times has less real detail left to work from, and the fix will be a visible improvement without being a perfect restoration.
Fixing Pixelated Photos in MagicShot
Upload the pixelated photo to MagicShot's image editor.
Choose the enhance option built to recover detail rather than a purely cosmetic filter.
Generate and check edges, especially around faces and text, where pixelation is most obvious.
Download the fixed file at full resolution instead of a screenshot of the preview.
Uploading the most original version of the file you have access to, rather than a screenshot of a screenshot, makes a real difference to the result, since there is more genuine data for the model to work from.
Fixing Pixelation Also Helps With Blur
Sometimes, but they are technically different problems. Pixelation is a resolution issue, blocky pixels made visible by stretching. Blur is a focus or motion issue, where detail is genuinely soft rather than blocky. A photo can have both at once, especially after repeated compression, and the same enhance pass often improves both together. For a photo that is mainly soft rather than blocky, How to Unblur a Photo: The Complete Guide covers that case specifically.
Avoiding Pixelation Next Time
PNG preserves quality better than repeatedly re-saved JPG, since JPG uses lossy compression that degrades a little on every save. For sharing, send the original file when possible instead of a screenshot, and use a platform's "send as document" or original-quality option if it offers one, since standard chat-image sending is usually the most compressed path available.
Read Next
More from this cluster:
How to Unblur a Photo: The Complete Guide for the related but distinct problem of soft focus and motion blur.
Image Enhancer: How AI Actually Improves a Blurry, Low-Res Photo for a broader look at what AI enhancement changes about a photo.