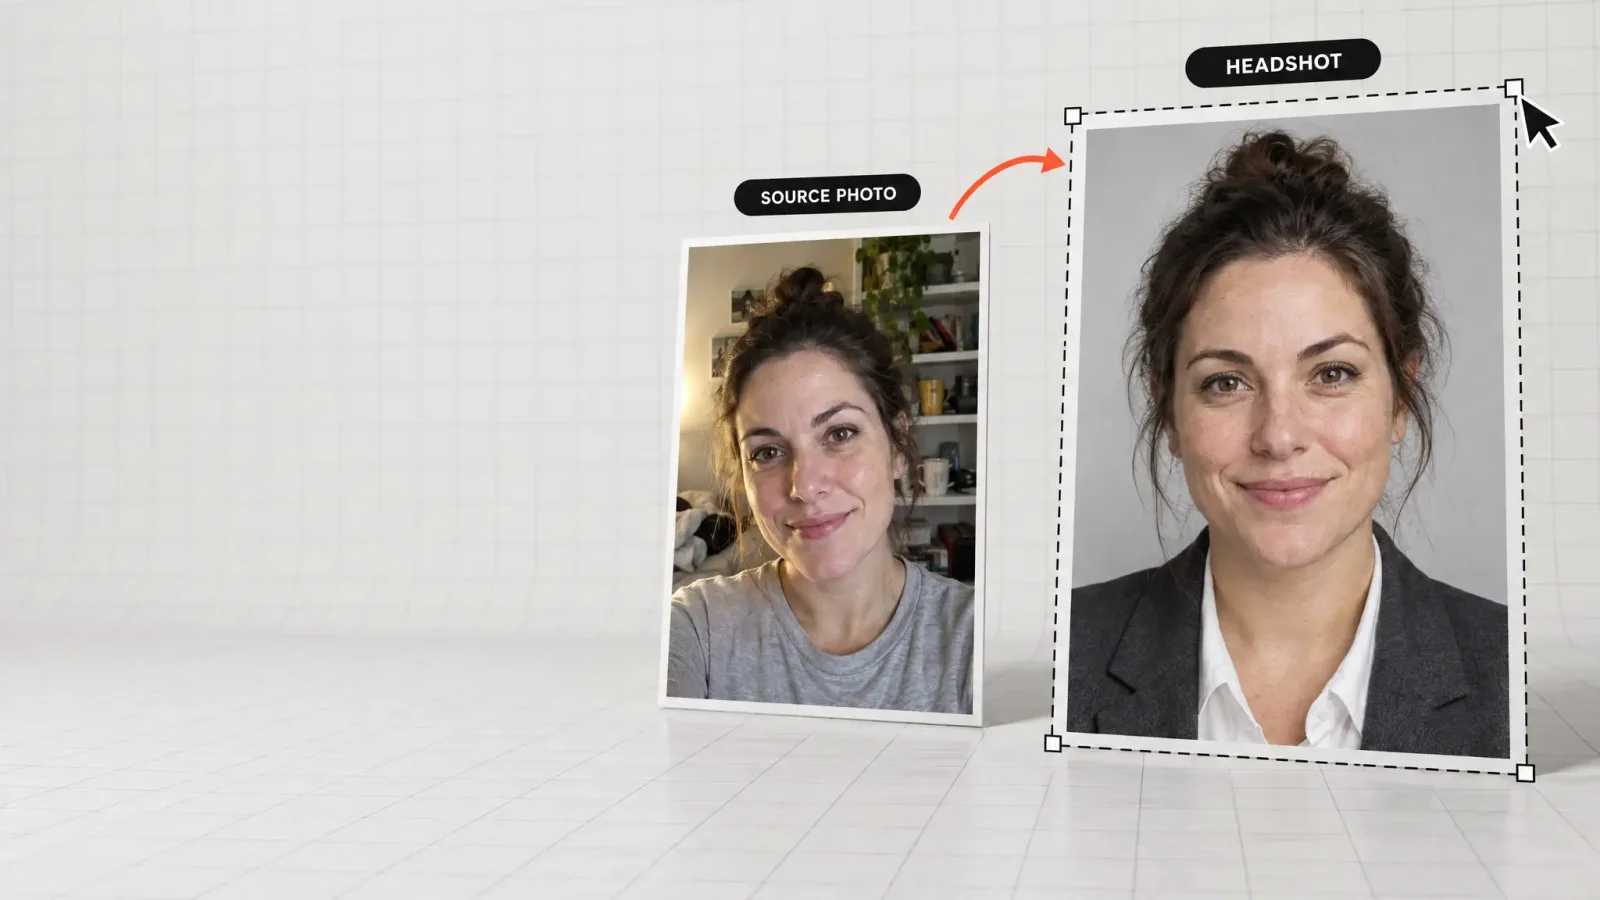
Dig through your camera roll and you probably already have a usable headshot hiding in there: a decent selfie, a photo from a friend's wedding, a shot from a conference. The trick is picking the right one. AI can turn an ordinary photo into something that looks studio-made in a few minutes, but it cannot invent a face it has not seen. So the result depends on the photo you choose far more than on any setting afterwards.
For the complete process, see our guide to turning a simple photo into a professional headshot.
How to choose a source photo
Light. Even, front-facing light works best. Harsh side light or a bright window behind you forces the model to guess at detail it cannot see.
Angle. Straight on, or a slight three-quarter turn. Side profiles give the model half a face.
Resolution. A recent phone photo at full size is plenty. Screenshots, photos of printed photos and heavily compressed images give it less to work with.
Expression. Pick a relaxed, natural one. A forced smile in the original tends to stay forced in the result.
Recent. Use photos from the last year or two so the result looks like you today.
Three steps in MagicShot
1. Upload one or more photos to the Professional Headshot Generator. Three to six good ones in different poses help the result stay consistent.
2. Choose a style category, such as corporate, creative, tech or healthcare.
3. Generate, then compare the set. Zoom in on hands, ears, glasses and hairline before choosing.
You do not need a separate lighting setup, a background change or a new outfit. Those are what the tool handles.
Photos that cause problems
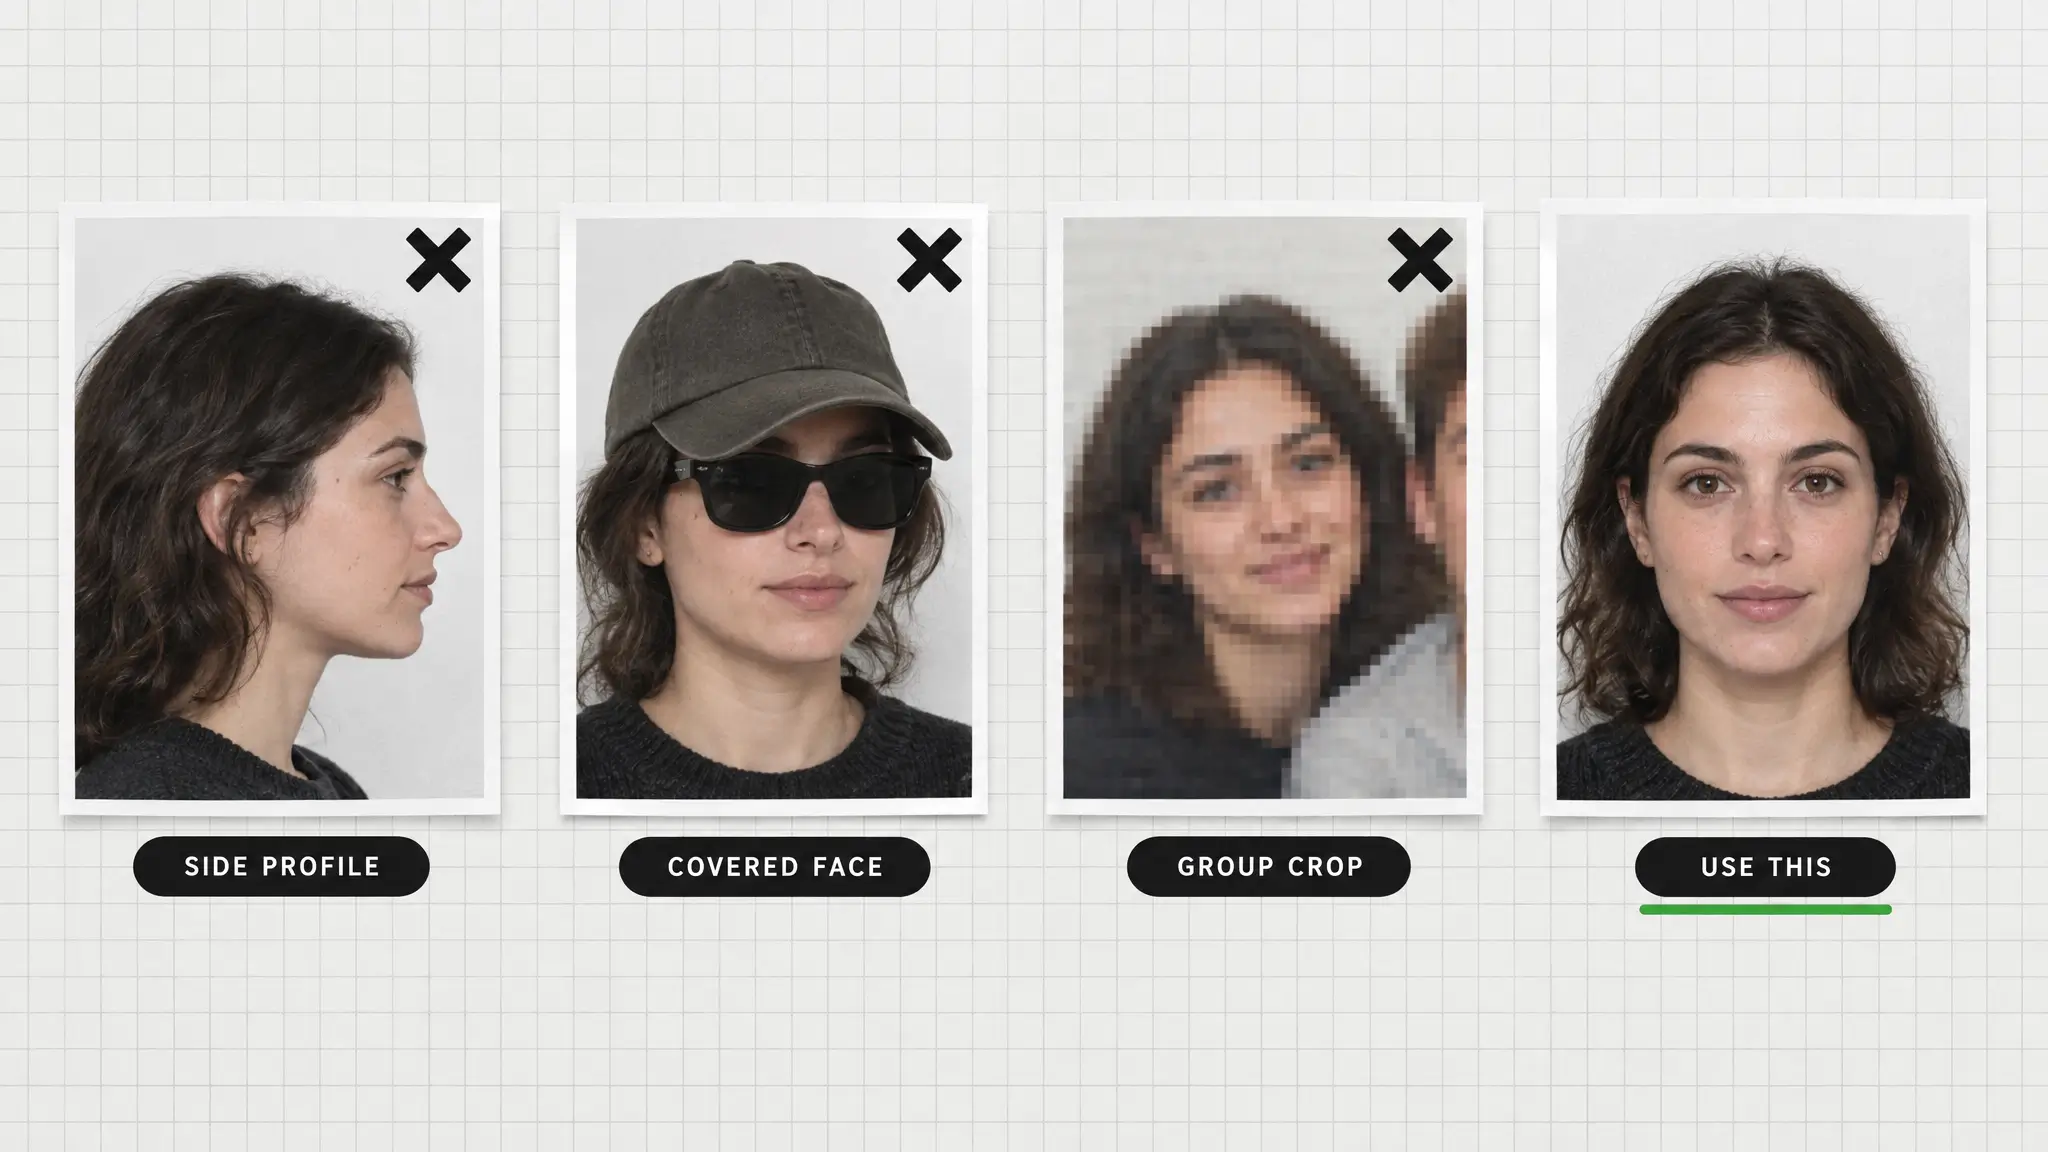
Side profiles, which give lopsided results.
Sunglasses, hats and heavy shadows, which hide the eyes and hairline.
Group photos. Cropping yourself out of a group usually leaves low resolution and awkward framing. Use a solo shot.
Filtered selfies. Beauty filters smooth skin before the AI starts, and the result can look doubly artificial.
Photos where your face is small. The model needs a clear view of the face, not a tiny one in a landscape.
What changes between before and after
A typical starting point is a slightly off-centre selfie with mixed indoor light and a cluttered room. A typical result has even studio-style light, a plain or softly blurred background and business clothing you may never have owned. The gap between the two is the value of the workflow. It is also why a poor starting photo disappoints: the tool improves the setting, not the underlying quality of the shot.
Try more than one look
You can generate more than one style from the same uploads, so compare a corporate version with a creative one and decide which suits which profile. For ideas on what good looks like in each style, read professional headshot examples: what good actually looks like, and see the headshot tool for the current style list.
One last check
Ask a friend whether the result looks like you. If they hesitate, go back and add more varied source photos.