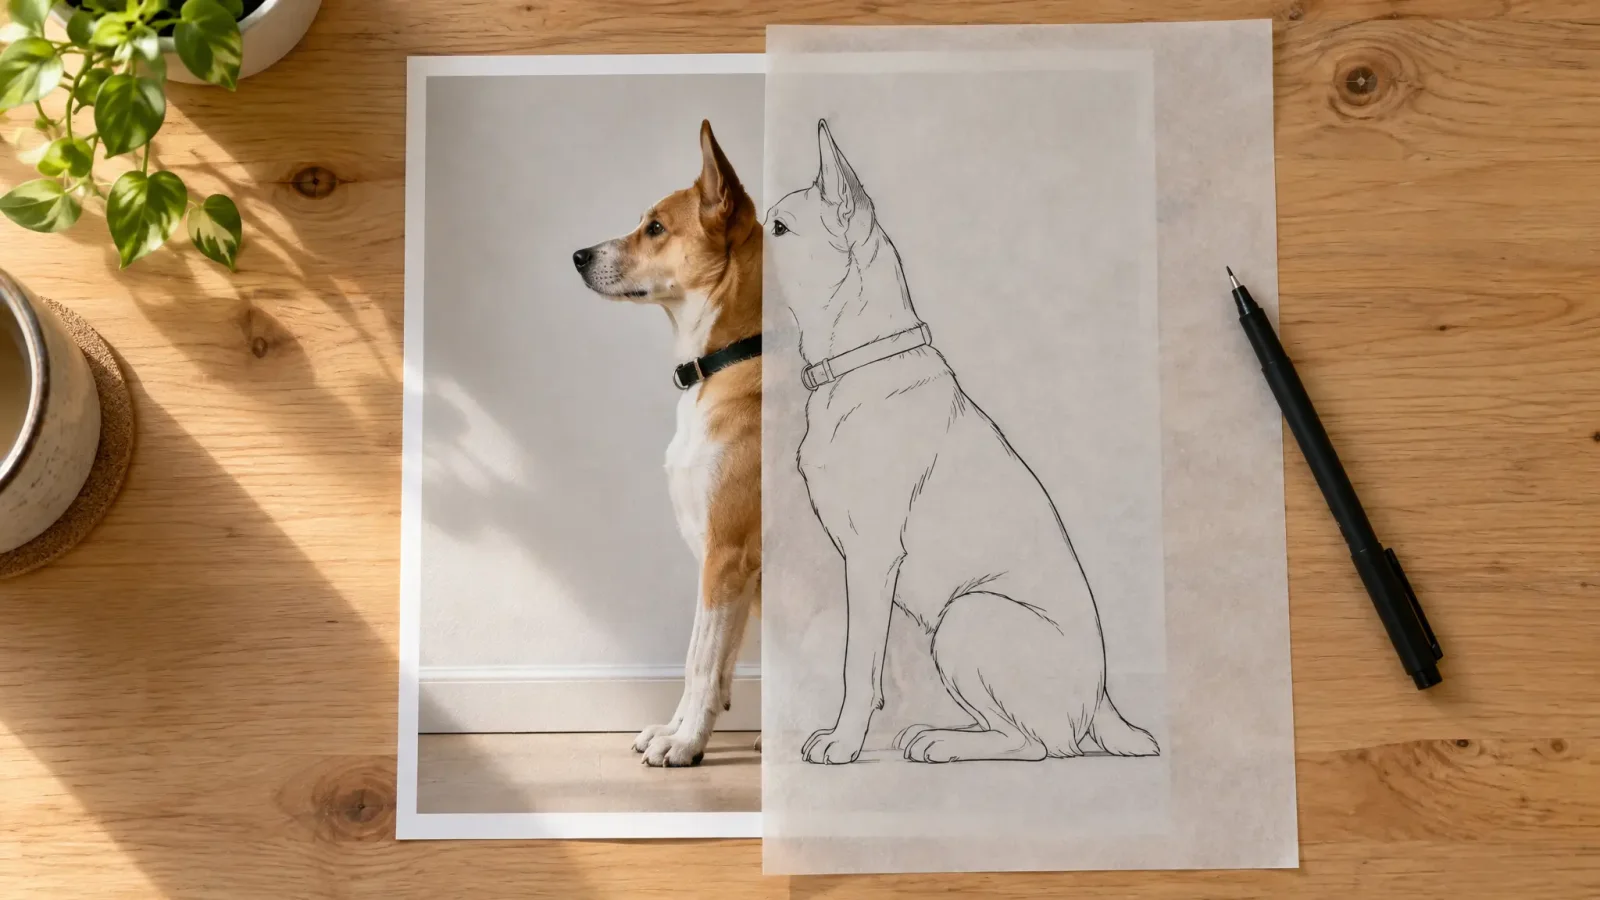
Plenty of people want a tattoo of their dog, their grandmother or a place that mattered. The photo is rarely the problem. The jump from a photo to skin is. A photo gets its depth from soft gradients and colour. A tattoo gets it from clean lines and solid shading. Whether a conversion works depends on how well your picture survives that translation, and you can find out in about ten seconds.
The squint test
Hold the photo at arm's length and squint, or shrink it to thumbnail size. Can you still pick out the subject by its outline and by clear dark and light areas? If yes, it is a good candidate. If it turns into a grey blur, the line-art conversion will struggle too.
Photos that convert well
A pet against a plain wall, where the outline is easy to trace.
A single meaningful object photographed head-on, such as a ring, a tool, a key or a handwritten note.
A portrait in strong, even light with visible contrast between features and skin.
Landmarks and silhouettes, which already read as shapes.
Photos that do not
Busy scenes with several overlapping subjects, which lose detail when reduced to line art.
Low-contrast photos, like a grey cat on a grey couch, a face lit from behind, or a sunset where the sky and subject blend.
Soft, blurry or heavily filtered images, because the tool has to guess at edges the camera never captured, and the guess reads as noise once inked.
How the conversion works
Upload the source image to the tattoo generator, choose a line-art or blackwork style, and generate. The tool traces edges and contrast into clean strokes scaled for skin instead of a screen. Then adjust line weight and simplify any area that came out too busy. Several passes with slightly different settings usually beat one.
Portraits are the hardest case
Faces depend on subtle shading, which line art must reduce to a handful of strokes. A portrait converts best from a photo with strong directional light and a clear angle, not a soft, evenly lit selfie. Expect to iterate, and simplify around the eyes and mouth, where extra lines look like clutter once inked.
Because a portrait of a real person, especially one who has died, carries a lot of weight, treat the AI result as a sketch. A tattoo artist experienced in portraits will redraw it and decide what to keep.
Can you keep some colour?
Yes. Ask for a limited palette of two or three tones on the same clean outline. Full photographic colour rarely holds up as a tattoo, but a simplified palette on a strong outline does. Start from a photo that already has one or two dominant colours.
Design for skin, not a screen
Thin, closely spaced lines can blur together as a tattoo ages, so choose bolder lines for small designs.
Leave space between elements. Dense areas turn into dark patches.
Size changes everything. A detailed design that works at 15 cm may be unreadable at 5 cm.
Placement matters: stretching, curves and joints distort designs.
Before you book
1. Print the design at actual size and tape it where it will go.
2. Bring the original photo and the AI version to your artist.
3. Ask them what to simplify, and let them redraw it. Many will insist.
Next steps
To add text, see ambigram and name tattoo generators. To prepare a file for your artist, read the tattoo stencil maker guide. The tattoo generator handles the conversion and style refinement in one place.