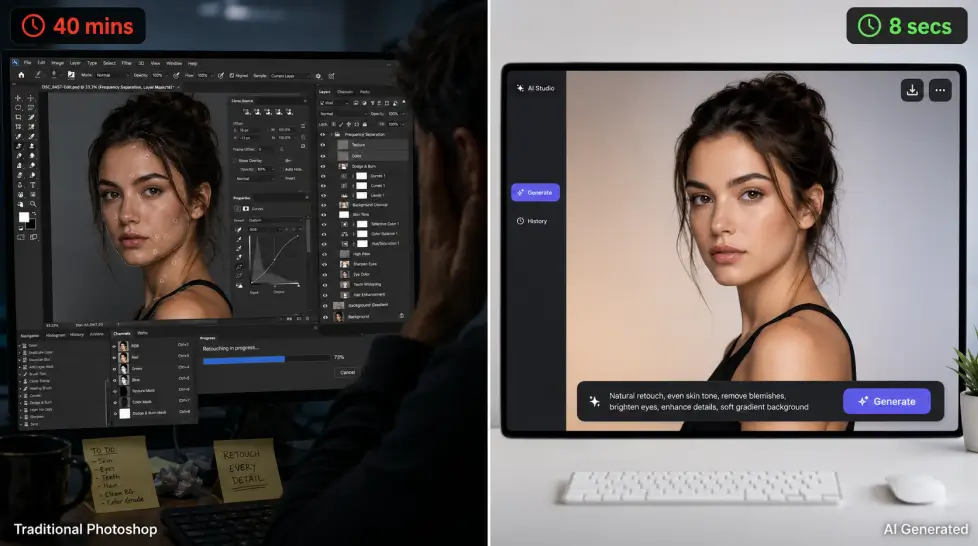
Photoshop used to be the only answer. Open the file, mask the subject, fight with the pen tool for 40 minutes, save, hate yourself a little. That whole routine is basically dead now.
AI photo editing in 2026 has eaten most of the work that traditional desktop apps were built for. Background removal? One click. Face cleanup on a blurry phone shot? 3 seconds. Colorizing your grandfather's wartime photo? Done before your coffee cools.
But not every AI editor is good. Some are bloated. Some give you that plastic-skin look that screams 'edited.' Some charge you for every single feature like it's 2014. So this guide does the actual work of separating the tools that earned their place from the ones that didn't.
I've spent the last few months running the same set of images through 12+ AI editors. Same selfies, same product shots, same old family photos. The differences were bigger than I expected. Let's get into it.
Why AI editing finally replaced desktop apps
Here's the part most articles get wrong. They'll tell you AI 'augments' your workflow. That's marketing talk.
The truth is more direct: for 80% of common editing tasks, AI just does the job better and faster than a human with Photoshop. The remaining 20% is custom compositing, very detailed retouching for high-end print, and weird experimental stuff. That 20% still belongs to traditional tools. Everything else moved.
Think about what people actually do with photo editors. They remove backgrounds for product listings. They fix faces in selfies before posting. They upscale screenshots and old photos. They colorize black-and-white shots. They tweak skin and eyes for portraits. They restyle a photo into a different mood.
Every single one of those tasks is now better in an AI tool. Not 'easier.' Better. The output quality crossed the threshold in 2024 and kept climbing.
The four shifts that broke desktop editors
One.
Speed. Background removal that took a careful 15 minutes with the pen tool now takes one click. The math isn't close.
Two.
Skill ceiling collapsed. You no longer need to know what dodge and burn means to make a portrait look professional. The AI handles the technique. You handle the taste.
Three.
Subscription fatigue worked against Adobe. Paying $60/month for one suite when an all-in-one AI platform does most of what you need for a fraction? People did the math.
Four.
Browser-based everything. No 90-minute install. No GPU upgrades. No 'this version isn't compatible with macOS Sequoia.' You open a tab and start.
Now. That doesn't mean Photoshop is gone. It's still a fantastic tool for the people who genuinely need it. But the casual creator, the small business owner, the freelancer, the social media manager? They moved. And they're not going back.
The AI photo editing category breakdown
AI editing isn't one thing. It's roughly 8-10 distinct categories of tasks, each with its own best tool. If you treat them as one big bucket, you'll pick wrong.
Here's how I think about it. There's
cleanup work (removing stuff, fixing flaws),
enhancement work (sharper, brighter, better quality),
generation work (adding things that weren't there), and
style work (changing the mood, look, or aesthetic). Each one needs different AI models under the hood.
Background removal
The single most-used AI feature on the planet. Probably. Every e-commerce store, every Etsy seller, every LinkedIn profile photo benefits from a clean cutout. The technology is mature. You really shouldn't be paying a per-image fee for this anymore.
What to look for: hair edges, transparent objects (glass, hair strands, jewelry), and complex backgrounds. The cheap tools fail on hair. Always test with a portrait that has flyaways.
If you need the workflow specifics, the guide on
how to remove a background from a photo using AI walks through the whole thing, including the edge cases that trip up other tools.
Image upscaling and resolution
You have a 800px image. You need 4K. Traditional resampling makes it blurry mush. AI upscaling actually generates the missing detail.
The catch? AI upscalers can invent details that weren't there. For a generic photo, fine. For something like a legal document or a face you need to be accurate, be careful. The good ones (we'll get to them) keep faces recognizable.
Face enhancement
This is the category that has the widest quality gap between tools. The bad ones make everyone look like a wax figure. The good ones make you look like the best version of yourself on a great lighting day.
The trick is restraint. Real skin has pores. Real eyes have asymmetry. Tools that smooth everything to oblivion miss the point. Look for face enhancement that keeps texture while cleaning up obvious flaws.
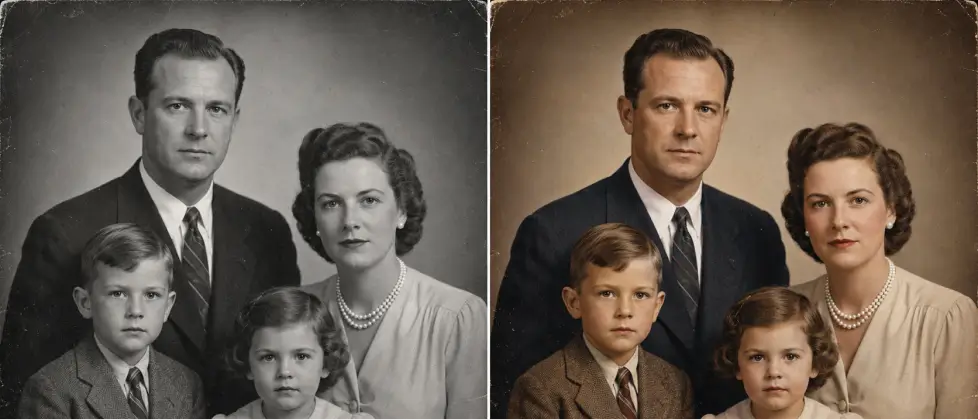
Colorization
Black and white photos turned color. This is honestly where AI feels like magic. Family photos from the 1940s come back to life. The skin tones are no longer guesswork.
The frontier here is historical accuracy. The latest models look at clothing type, era, location clues, and probable lighting to make smart choices. Not just 'paint the sky blue.'
Object removal and inpainting
Tourist in your vacation photo? Power line crossing your skyline? Random trash in the corner of your product shot? AI removes it and fills the background. The early versions left ghosts. The current ones don't.
Style transfer and reimagining
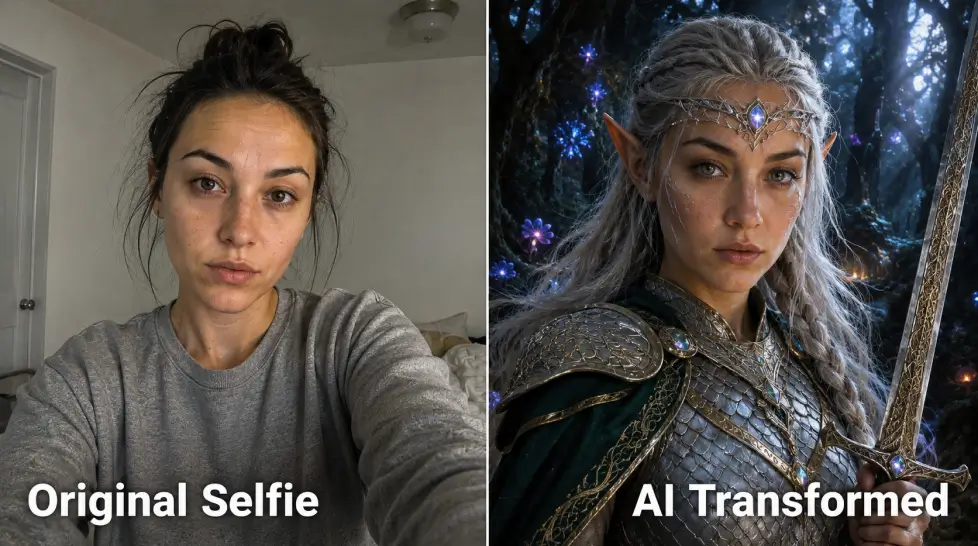
Take a photo, turn it into a watercolor painting. Or an anime scene. Or a film noir frame. Style transfer used to look gimmicky. Now it looks like art direction. Useful for social content, mood boards, and creative projects.
Text rendering inside images
For years, AI couldn't spell. Posters had gibberish text. That's basically fixed in 2026. You can now generate signs, posters, and graphics with legible, accurate text. Big deal for designers.
Face and outfit modification
Try a different hairstyle. Try a different outfit. See yourself at a different age. Each of these used to require Photoshop expertise plus reference photos plus hours. Now you upload one selfie and pick from options.
Let me cut through the noise. Here's what wins each category based on output quality, speed, edge cases, and price. I'll be honest about where MagicShot fits and where it doesn't.
| Task |
Best tool |
Why it wins |
| Background removal |
MagicShot AI Background Remover |
Handles hair edges cleanly, works on glass and transparent items, included in subscription |
| Face enhancement |
MagicShot Face Enhancer |
Keeps skin texture, fixes blurry eyes, doesn't over-smooth |
| 4K upscaling |
MagicShot AI Image Upscale |
Preserves faces, sharp on detail, no artificial halos |
| Photo colorization |
MagicShot AI Image Colorizer |
Smart skin tones, era-appropriate colors |
| Object/text removal |
MagicShot AI Text Removal |
Clean fills, no smudge zones |
| Style restyling |
MagicShot AI Re-Imagine |
Wide style range, preserves composition |
| Heavy custom compositing |
Photoshop (still) |
Layer-level control AI can't match |
Yes, this list leans on MagicShot. Not because I'm trying to sell you anything but because
AI image editing on one platform with one subscription is genuinely simpler than juggling six different apps with six different bills.
The 'all-in-one' angle isn't a gimmick. It actually changes how you work. When background removal, face enhancement, and upscaling are three clicks away from each other, you don't lose 20 minutes copying files between tools and re-uploading.
MagicShot overview: what you actually get
Quick disclosure before this section. I write for MagicShot. So take this part with that context. But I'm going to tell you what's actually here and what isn't, because pretending everything is amazing is the fastest way to lose trust.
MagicShot.ai is an all-in-one AI creative platform. 56+ features. One subscription. The platform covers image generation, image editing, video generation, character work, and specialty creative tools. The editing side is what we're focused on here.
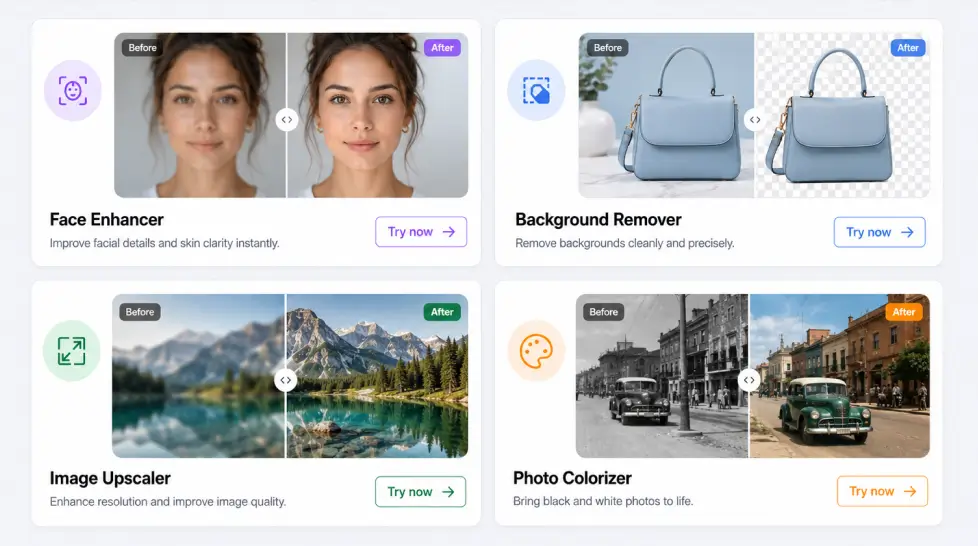
Image editing features inside MagicShot
- AI Background Remover — one-click clean cutouts, transparent PNG output
- Face Enhancer — sharpens eyes, restores detail, fixes blur, preserves texture
- AI Image Upscale — up to 4K with AI super-resolution
- AI Image Colorizer — colorizes black-and-white photos with realistic tones
- AI Text Removal — removes watermarks, text, or unwanted elements
- AI Re-Imagine — restyles photos into different aesthetics
- Extend Image — outpaints beyond the original borders
- AI Image Editing — text-based edits to any photo (change clothes, swap colors, alter background)
- Fashion Try-On — try outfits on your photo virtually
- Face Swap — swap faces between two photos
- AI Hair Style — test different cuts and colors before a salon visit
- Pixel Perfect — recovers detail in compressed images
For specialty work like portraits, headshots, or product photography, there are dedicated features on top of these editing tools. The
Headshot Generator alone replaces an entire LinkedIn photo session, and the
AI Product Photography tool produces studio-quality product shots without a studio.
What MagicShot doesn't do as well
Honest moment. If you need pixel-level layer compositing for a magazine cover, this isn't the tool. If you're doing very specific film-grain simulation or color grading for cinema, get a dedicated grading suite. If your workflow requires Adobe-specific features like Camera Raw lens profiles, those don't exist here.
For 95% of editing work that the rest of the world actually does? It's enough. More than enough.
Pricing reality
One subscription unlocks every feature. That includes the video tools too (Kling Omni, VEO 3.1, Seedance 2.0, Wan 2.6), which matters if you do any image-to-video work. Compare that to paying separately for image AI, video AI, headshot AI, and product photo AI. The math isn't subtle.
The full AI photo editing workflow
Order matters. This is the part most beginner tutorials skip and it's the reason people get bad results. If you upscale a blurry face, you get a bigger blurry face. If you colorize an unrestored photo, the colors latch onto scratches and dust.
Here's the order I follow. It works for almost any photo.
Step 1: Assess the photo
Before clicking anything, look at what you have. Is the resolution low? Is the face blurry? Is there a distracting background? Are there scratches, watermarks, or noise? Is the lighting flat?
Make a mental list. The list determines which tools you'll use and in what order. Don't just start editing randomly. That's how you spend 40 minutes and end up worse than where you started.
Step 2: Clean up first
Remove anything that shouldn't be there. Watermarks, text overlays, dust, scratches, that random tourist in the corner. Use AI Text Removal or inpainting tools. Clean canvas first, fancy edits later.
If you're doing a portrait and the background is messy, this is also when you might want to remove the background entirely. But hold off if you want to keep the original scene and just touch it up.
Step 3: Fix the face (if there is one)
For portraits and selfies, the face is the eye magnet. If the face is off, nothing else matters. Run face enhancement to sharpen eyes, recover blurry features, and fix obvious skin issues. The detailed walkthrough on
how to enhance your photo with AI face enhancer covers the settings that matter and the ones to leave alone.
Restraint here. The temptation is to crank every slider to maximum. Don't. Subtle enhancement beats heavy enhancement every single time. You want the photo to look like you on a great day, not like a different person.
Step 4: Upscale if needed
If your image is small or low-res, upscale now. Not before. Upscaling adds detail by guessing. You want it to guess based on the cleaned-up version, not the original mess.
4K is the new standard. Even Instagram, which used to compress everything, now shows 4K source images crisper than ever. Print? Definitely 4K minimum.
Step 5: Color correction or colorization
For black-and-white originals, colorize now. The colorizer reads the photo's content and assigns realistic tones. For color photos that look flat or off, this is the stage for color adjustment.
If you want to restyle entirely (turn it into watercolor, anime, film noir, whatever), do that here too.
Step 6: Text-based edits
The newer AI editors let you describe a change in plain text. 'Change the shirt to navy blue.' 'Add a sunset in the background.' 'Make the lighting warmer.' This is where you fine-tune specifics without learning layer masks.
Don't go overboard. One edit at a time, check the result, iterate. Compound edits in one prompt usually disappoint.
Step 7: Background work last
If you want a transparent PNG for product use or a clean new background, do this absolutely last. Why? Because everything you did before — face enhancement, upscaling, color — needs to apply to the subject before you isolate them.
Export, save with a sensible filename, and you're done.
Specific use cases and which workflow to follow
The 7-step flow above is the general one. But specific use cases have their own shortcuts. Let me walk through the most common ones I see.
Use case 1: LinkedIn headshot from a phone selfie
Skip the multi-step flow. Use the dedicated headshot generator. The full process is covered in
how AI can help you design a professional LinkedIn headshot, but the short version: upload one selfie, pick a background style (corporate, casual, creative), generate, pick favorites. Done in under 5 minutes.
Use case 2: E-commerce product photo
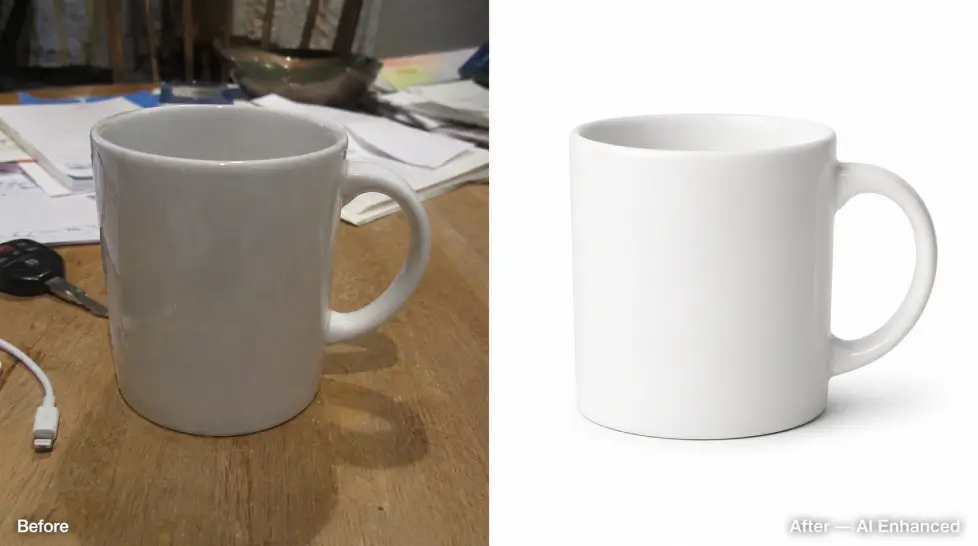
Phone shot of your product. Background remover. Then either generate a clean studio background or use AI Product Photography to place it in a styled scene. Upscale to 4K. Export. Your product page now looks like you hired someone.
Use case 3: Restoring an old family photo
Scan or photograph the print. Use AI Text Removal to clean dust and scratches (treat them as 'text'). Upscale to recover detail. Run face enhancement on every face in the photo. If it's black and white, colorize. The transformation is genuinely emotional. I've seen people cry over restored family photos.
Use case 4: Social media content from existing photos
Take your photo. Run AI Re-Imagine for a stylistic twist if you want it to stand out. Crop to platform-specific ratios (9:16 for stories and Reels, 1:1 for grid). Add text overlay with the right contrast. Post. The whole flow takes maybe 8 minutes per piece of content.
Use case 5: Dating profile makeover
Real talk. Most dating profile photos are bad. Bad lighting, bad cropping, weird expressions. The fix isn't another selfie — it's running a few decent existing photos through an AI editor. Face enhancement, background cleanup, maybe a couple of variations with different backgrounds. The dating profile photo guides on MagicShot show this in detail.
Common mistakes that ruin AI edits
Things I see beginners do that absolutely kill the output. Save this list.
Over-enhancing. Cranking every slider to max gives you that uncanny valley look. Always pull back. If it looks edited, it's overedited.
Wrong order. Already covered above but worth repeating. Don't upscale before cleaning. Don't colorize before fixing scratches. Don't background-remove before enhancing the subject.
Starting with a terrible source. AI can do a lot but it can't perform miracles on a photo where the subject is completely out of focus or the lighting is genuinely awful. Pick the best source image you have before applying tools.
Trusting one click for everything. Some 'magic enhance' buttons do too much at once. You lose control. Better to do focused steps one at a time so you can see what each tool is contributing.
Ignoring resolution. Exporting at 800px for a billboard. Or working at 4K when you only need a thumbnail. Match your output to your actual use.
Not saving versions. Save the original. Save the cleaned version. Save the final. AI doesn't always let you undo to the start. Don't lose your work to a bad edit.
For a deeper list, the post on
common mistakes when using AI image generators covers a lot of these patterns and how to avoid them.
What's coming next in AI photo editing
Quick look at where the technology is going, because if you're investing in learning a workflow now, you want to know what'll still be relevant in 12 months.
Better consistency across edits
Right now, if you generate the 'same person' in two different scenes, they might look subtly different. The next wave of models handles consistency much better. You'll be able to maintain a character or product look across dozens of variations.
Real-time editing
Browser-based real-time editing where you can see changes as you type prompts. This is starting to happen and it'll change how creative work feels. No more 'generate, wait 8 seconds, see if it's right, try again.'
Voice and natural language control
'Make her smile a bit more.' 'Add a window to the left wall.' Natural language commands that work like a creative director talking to an assistant. We're already partway there.
Hardware running models locally
Apple Silicon and high-end NVIDIA chips can run smaller versions of these models on-device. Privacy improves. Speed improves. Eventually, your laptop might do what currently requires the cloud.
Better video editing convergence
Photo and video editing are converging. The same prompts that work for stills increasingly work for video too. Image-to-video tools like the ones inside MagicShot already let you animate a still with controlled motion. That gap will keep closing.
The bottom line
AI photo editing in 2026 isn't a 'maybe try it.' It's the default for everyone who isn't doing high-end commercial print work. The quality crossed the line. The price crossed the line. The skill barrier collapsed.
Pick one all-in-one platform instead of stitching together six tools. Learn the order — clean, enhance, upscale, color, edit, background. Use restraint. Save your versions.
That's basically the whole game.
If you want to start with the tools that actually work and not waste an afternoon testing junk, MagicShot covers the editing categories that matter under one subscription. Open a tab, upload a photo, and you'll see the difference between this and the desktop apps you were holding onto. The first edit takes maybe 30 seconds.
Edit something today.