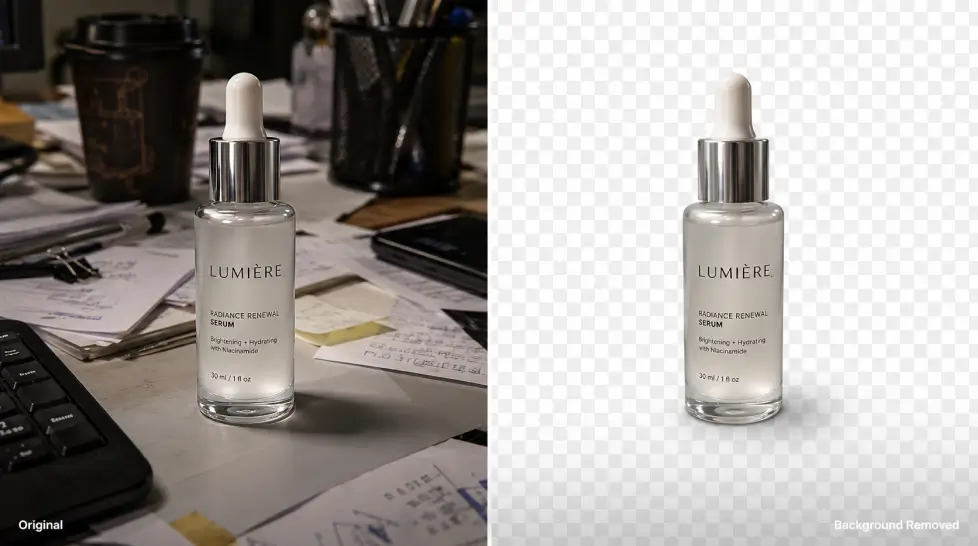
You don't need Photoshop for this anymore. Really.
The whole "select the subject, refine the edge, paint the mask" routine that used to eat 20 minutes per image? Gone. A good
AI background remover does it in one click, and most of the time the result is clean enough to ship. Most of the time. Not always — and I'll get to where it struggles.
This is a how-to. Real steps, real screenshots-in-your-head, and honest notes on what breaks. If you sell products online, run a small content shop, or just need a clean cutout of your dog for a birthday card, this covers it.
1. When you actually need an AI background remover
Not every photo needs a background swap. But these do:
- Product photos for Amazon, Shopify, Etsy. Marketplaces want pure white or transparent. No exceptions on Amazon's main image rules.
- Profile photos for LinkedIn, Slack, websites. A clean cutout on a brand color looks ten times more polished than a kitchen background.
- Marketing creatives. Banner ads, email headers, social posts — you need the subject isolated so you can drop it onto a designed background.
- Thumbnails. YouTube creators have been doing this forever. Subject cutout, big text behind, done.
- Memes, stickers, fun stuff. Transparent PNGs feed into a hundred other tools.
What you don't need it for: editorial photography, anything where the background tells the story, or shots where the subject is genuinely part of a scene. Cutting out a person from a beach photo to put them on a beach is just extra steps. Ask yourself if you actually need the cutout before you start.
2. Step-by-step: remove background from photo AI
Here's the whole flow. It's short on purpose.
Go to the
AI background remover. No download, no plugin. Browser only.
Step 2: Drop your image
Drag and drop, or click to upload. JPG, PNG, WebP all work. Keep it under 20MB for speed. Bigger files just take longer to process — they don't give you a better result if the source is already sharp.
Step 3: Export
PNG keeps the transparency. That's what you want 90% of the time. Click download.
That's it. Five steps, mostly automatic. The whole thing takes maybe 30 seconds per image once you've done it twice.
If you want a deeper breakdown of the underlying process, the team published a full
walkthrough on how AI background removal works that goes into the segmentation models. Optional reading.
3. Clean edges around hair (the hard part)
Hair is where every background remover I've ever tried gets tested. Flyaways, curls, that fuzzy halo at the edge of a portrait — this is where one-click tools either nail it or fall apart.
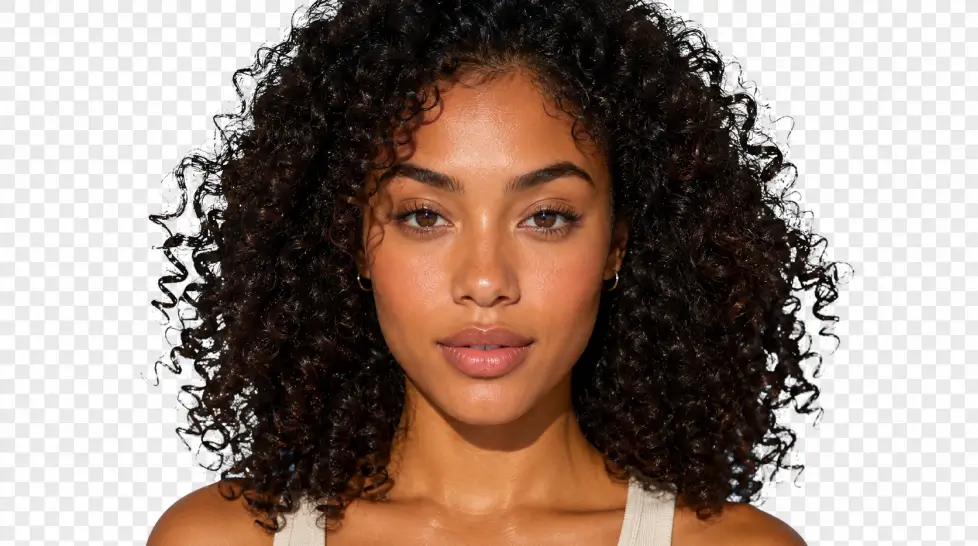
Here's what I've found works:
Lighting in the original photo matters more than the AI
If your hair is backlit against a bright window, the AI sees a clean silhouette and the cutout is gorgeous. If your hair is dark and the background is also dark, even the best model struggles because there's no contrast for it to find an edge. Garbage in, garbage out. This is true for every tool.
Plain backgrounds give better hair edges
A studio backdrop, a blank wall, a gradient — these all produce cleaner hair masks than a busy living room. If you're shooting fresh content specifically for cutouts, give yourself a plain wall.
When edges look chewed up
You've got two moves. One: re-upload at higher resolution and let the model try again — sometimes it picks up more detail. Two: use a manual edge refine if the tool offers it. MagicShot has a brush tool to clean small areas without redoing the whole mask.
Pet fur, by the way
Fur is hair's harder cousin. Long-haired dogs, fluffy cats. Same rules apply but expect to do a tiny manual touch-up on at least 1 in 3 photos. It's still way faster than masking by hand.
4. What to do after removing the background
So you've got a transparent PNG. Now what? This is where most tutorials stop and leave you stuck.
Drop it onto a new background
The whole point, usually. For product photos, you want pure white (#FFFFFF) for marketplaces or a brand-colored backdrop for your own site. For portraits, a soft gray gradient looks expensive. For social, a bold color or a designed scene.
Generate a new background with AI
Better idea for product shots: instead of just slapping it on white, use
AI product photography to drop your isolated product into a styled scene. Marble countertop, wooden table, lifestyle setting. Takes another 20 seconds.
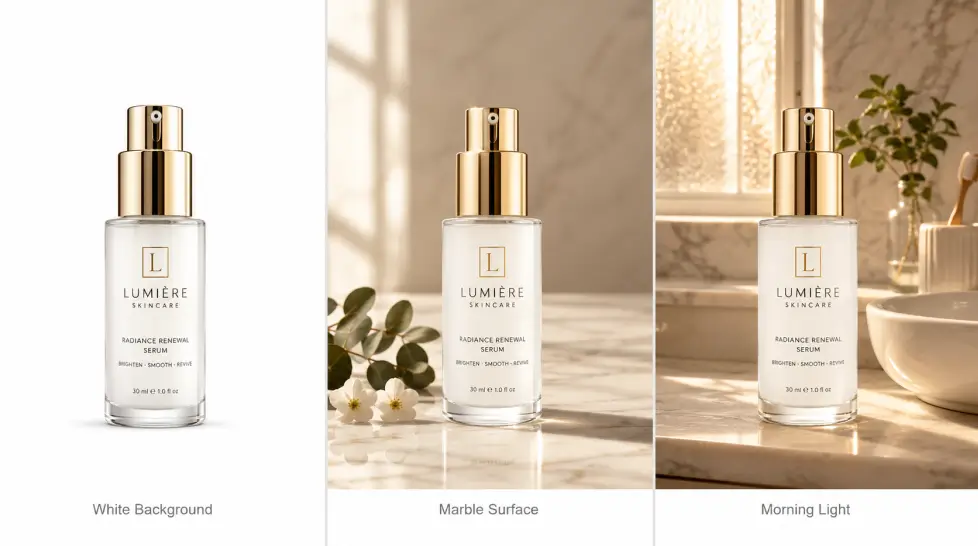
Extend the canvas if your subject is cut off
Sometimes the original shot crops the subject too tight and now that you've removed the background, you've got no breathing room. Use
extend image to add space around the subject. Especially useful if you need different aspect ratios — square for Instagram, vertical for Reels, wide for a website banner.
Add a shadow back
A pure cutout with no shadow looks fake. Products especially need a subtle drop shadow under them or they look like they're floating. Most design tools let you add one in two clicks. Keep it soft, low opacity, slightly offset.
Resize and compress
Your transparent PNG is probably huge. Run it through a compressor (TinyPNG, Squoosh, whatever) before uploading anywhere. Web pages don't need 8MB product images.
5. Batch removal for sellers
If you've got 5 product photos, doing them one by one is fine. If you've got 200, you need batch processing or you'll lose your mind.
How batch works
Upload multiple files at once. The AI processes them in parallel or in a queue. You get a zip of transparent PNGs at the end. MagicShot handles batches in the same interface — drag in 20 files, walk away, come back to a folder of cutouts.
Speed math
Single image: 5-10 seconds. Batch of 50: about 3-5 minutes. Compare that to doing it manually in Photoshop — even a fast editor takes 2-3 minutes per image with clipping paths. That's 2 hours saved per batch of 50. Honestly, even more once you factor in the eye strain.
Keep your file names
Pro tip nobody mentions: rename your source files before uploading. SKU-001.jpg, SKU-002.jpg. The transparent PNGs come out with matching names. Saves you the headache of figuring out which cutout goes with which product later.
What about consistency?
Batch processing is consistent in quality because the same model handles everything. Manual masking varies — you get tired, you get sloppy on image 30, the last 20 look different from the first 20. AI doesn't get tired. There's a longer write-up of how teams use
AI background removal in design and content workflows if you want to see how agencies set this up.
When batch fails
Sometimes one image in the batch comes out wrong — usually because the AI confused the subject with something else in the scene. Spot check before you ship. I'd say 1 in 25 needs a redo. Not bad odds.
Quick comparison: one-click AI vs old-school methods
| Method |
Time per image |
Skill needed |
Hair quality |
| AI one-click |
5-10 seconds |
None |
Good to excellent |
| Photoshop magic wand |
1-3 minutes |
Beginner |
Poor on hair |
| Photoshop pen tool |
5-15 minutes |
Intermediate |
Sharp edges only |
| Manual mask + refine edge |
10-30 minutes |
Advanced |
Excellent (worth it) |
For 95% of work, one-click wins. For magazine-cover, hero-shot, every-pixel-matters work, a skilled human with the refine edge tool still beats AI on the trickiest hair edges. But that 5% is shrinking every quarter.
What still trips up the AI
Being honest here:
- Glass and reflections. Wine glasses, perfume bottles, anything transparent. The AI removes the background but also tries to remove what you can see through the glass. Sometimes you want that. Often you don't.
- Mesh and lace. Fishnet stockings, lace curtains, fine mesh on a sneaker. The AI either keeps the background showing through the holes or fills them in solid. Neither is right.
- Subject blends into background. Black cat on black couch. White dress on white wall. No contrast means no edge.
- Multiple subjects you only want one of. Group photo where you want one person. The AI tends to keep all the humans. You'll need a manual select for that.
Workarounds exist for all of these but they break the one-click promise. If you hit one of these cases, plan for an extra minute of manual cleanup.
Wrapping up
One-click background removal isn't magic. It's just a really good model that handles 90% of the boring cases so you don't have to. For product sellers, content creators, and anyone making marketing visuals, this saves real hours every week.
Try it on one of your own photos before you commit to a workflow. Start with an easy one — clear subject, plain background. Then push it harder. You'll figure out fast where it shines and where you need to step in.
Now go cut some backgrounds.