How to Animate Your Photos Into AI Videos (Image to Video Guide)
- How-to Guides
- 7 min read
- Published: May 16, 2026
- Harish Prajapat
Photos stop the scroll for half a second. Videos hold it for five. That gap is the entire reason image to video AI exploded in 2025, and it’s why animating still photos is now one of the fastest ways to get more eyes on whatever you post.
This guide walks through how to actually do it. Not the marketing version. The real version, with the steps, the motion choices that work, the ones that look cheap, and a few pro tips I picked up after rendering way too many clips.
Why animated photos perform better than static ones
Algorithms reward watch time. A still image gets a glance. A 5-second loop of that same image with subtle motion, a slight breeze in the hair, the camera drifting in, a flicker of light, gets watched two or three times before someone scrolls. That’s free reach.
And it’s not just social. Product pages with short looping clips convert better than ones using only photos. Email open rates climb when a GIF preview shows motion. Even LinkedIn (yes, LinkedIn) pushes video posts harder than static ones.
The barrier used to be cost. You needed a camera, a shoot, an editor, maybe an animator. Now you need a photo and a prompt. That’s the shift.
Quick reality check though. Not every photo deserves motion. A serious product shot with too much animation looks gimmicky. A wedding portrait with the eyes moving feels haunted. Pick your spots.
What types of photos work best for AI animation
Some photos are basically begging to be animated. Others fight the model the whole way. Here’s what I’ve found actually works.
Photos that animate beautifully
- Landscapes with natural elements — water, clouds, fire, grass. The model has clear cues for what should move.
- Portraits with clean backgrounds — the AI knows where to focus motion (hair, eyes, micro expressions) without warping the background.
- Product shots on simple surfaces — perfect for slow orbits and rotating reveals.
- Architecture and interiors — slow dolly-ins look cinematic with almost zero effort.
- Pet and animal photos — small head turns and tail movement read as natural.
Photos that struggle
- Group photos with lots of faces (something always warps)
- Cluttered scenes with overlapping objects
- Heavy text overlays already baked in
- Photos shot through reflections or glass
- Anything with multiple hands close together. Hands are still hard.
Actually, scratch that last one a bit. Newer models handle hands way better than they did a year ago. But group photos with multiple hands? Still a mess.
How to turn a photo into a video with AI: step-by-step
This is the part most guides skip. Here’s the workflow that consistently produces clean output, not just one good frame out of ten.
Step 1: Pick the right photo
High resolution helps. Not because the model needs it, but because the output video resolution caps based on the input. A 600px wide JPEG becomes a soft, fuzzy clip. Use the original file from your camera or phone if you can.
If your photo is low-res or compressed, run it through an AI image upscaler first. Five seconds of work, much sharper result.
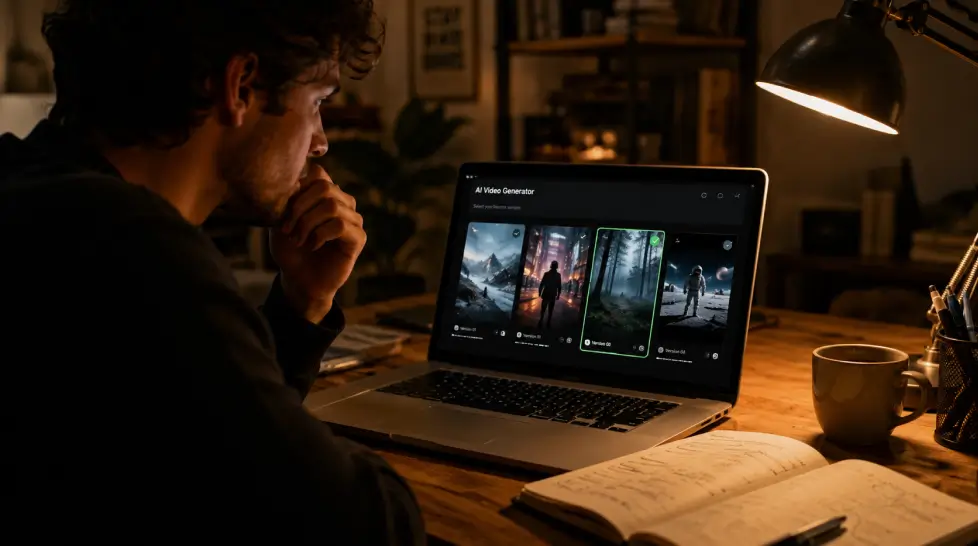
Step 2: Upload to an image to video AI tool
Head to MagicShot’s image to video feature. Drop in the photo. The interface gives you a prompt box and motion presets.
Step 3: Write the prompt (or skip it)
You have two options. Use a preset motion style and let the model decide what moves. Or write a prompt describing exactly what should happen.
Prompts that work:
- “Slow zoom in on the subject’s face, gentle wind moves the hair, soft cinematic motion”
- “Camera orbits around the product clockwise, dramatic lighting”
- “Subject smiles slowly, eyes blink naturally, background remains still”
Prompts that don’t:
- “Make it cool”
- “Add motion”
- “Cinematic vibe”
Be specific. The model takes your words literally. If you say “the dog runs across the frame,” expect a running dog. If you say “add some movement,” expect chaos.
Step 4: Pick your model
This part matters more than people realize. Different models have different strengths:
| Model | Best For | Speed |
|---|---|---|
| Kling Omni | Realistic human motion, portraits | Medium |
| Veo 3.1 | Cinematic camera moves, landscapes | Slower |
| Seedance 2.0 | Quick social clips, dance, action | Fast |
| Wan 2.6 | Product motion, e-commerce | Fast |
For most photos, Kling Omni is the safe default. For product work, Wan 2.6. For 16:9 storytelling clips, Veo 3.1. If you want to go deeper, the Seedance 2.0 deep dive covers when to use each model.
Step 5: Set duration and aspect ratio
Start with 5 seconds. Always. Longer clips are where things get weird. The model can hold a subject coherent for around 5 to 8 seconds before features start drifting.
Aspect ratio depends on where it’s going:
- 9:16 for TikTok, Reels, Shorts, Stories
- 1:1 for Instagram feed
- 16:9 for YouTube, websites, ads
Step 6: Generate, review, regenerate
First render is rarely the keeper. Generate three or four versions with the same settings. Pick the cleanest one. This is normal. Even professional AI video creators throw out half their output.
Motion styles explained
If you’ve ever wondered why some AI animated photos look slick and others look like they’re melting, it’s almost always the motion style.
Subtle ambient motion
Small movements only. Hair drifting, eyes blinking, fabric shifting, smoke rising. This is the safest style. Hard to mess up. Great for portraits and atmospheric shots.
Camera-driven motion
The subject barely moves. The camera does the work. Slow zoom-in, dolly forward, orbit around the subject. This is where Motion Control earns its place. You can dictate the exact camera path instead of hoping the model picks well.
Subject-driven motion
The subject moves while the background stays grounded. A person turning their head. A car rolling forward. A dog wagging its tail. Harder to nail because the model has to keep the subject coherent across frames.
Full scene animation
Everything moves. Background, foreground, subject, camera. This is the riskiest style. It can look incredible or it can look like a fever dream. Use it for stylized, dreamlike content, not realism.
Honest take? Subtle ambient + camera motion is the combo that works 80% of the time. Save the chaotic full-scene stuff for when you actually want surreal.
Using image to video AI for product videos
This is where the ROI gets obvious. A product photo costs you almost nothing. A product video used to cost $500+ for a basic clip. Now it costs a few credits.
The workflow for product content is slightly different. You’re not trying to add emotion or storytelling. You’re showing the product clearly with motion that highlights features. Product to Video is built for exactly this, with motion presets tuned for e-commerce.
What works for product clips:
- Slow 360-degree rotation on a clean background
- Camera push-in highlighting a key detail
- Light sweep across the surface (great for reflective products)
- Product lifting or floating with subtle gravity defiance
What doesn’t work:
- Adding fake people interacting with the product (uncanny valley territory)
- Animating logos or packaging text (the model warps the letters)
- Trying to show liquid pour or splash effects (still rough)
For more on this, the guide to cinematic ads with product to video walks through real examples.
Pro tips that actually move the needle
Stuff I wish someone told me when I started.
Match the motion to the mood. A wedding photo doesn’t need fast camera moves. A sneaker drop doesn’t need slow, sad ambient motion. The vibe of the photo should drive the vibe of the animation.
Loop matters. If the clip is going on social as a GIF or short video, make sure the first and last frames match. Use a motion style that returns to its starting position. Otherwise the loop break is jarring.
Stack effects. Generate the animated video first, then run it through a video sound generator to add ambient audio. A silent clip feels half-finished. Even a 2-second wind sound or product hum adds 30% more polish.
Don’t over-prompt. One clear sentence beats a paragraph of adjectives. Models start hallucinating when you stuff in too many descriptors.
Use Motion Control for cinematic shots. If you’ve ever watched a film and noticed how camera movement carries emotion, that’s what you’re recreating. Manual camera direction beats letting the AI guess every time.
Save your seeds. If you get a great result, note the model, prompt, and seed number. You can regenerate with small variations instead of starting from scratch.
Test on mobile first. What looks good on a 27-inch monitor often looks weird on a phone. Most viewers are on mobile. Watch your output on the smallest screen it’ll appear on.
One more. The full image to video AI breakdown goes deeper on prompt engineering if you want to keep going.
The free question: image to video AI free 2026
Almost every tool now offers some free generations. The pattern is the same. Free credits to test, paid subscription for volume. MagicShot’s free tier lets you try image to video without a credit card. Enough to see if the output works for what you need.
If you’re producing content regularly, the math swings to subscription quickly. One paid plan covers all 56+ features including image to video, headshots, product photography, and the rest. Cheaper than a single freelancer day rate.
One last thing
Image to video AI isn’t going to replace real cinematography. It’s not supposed to. What it does is collapse the gap between “I have a photo” and “I have a video.” That used to take a team. Now it takes a prompt and 90 seconds.
The creators winning right now aren’t the ones with the fanciest gear. They’re the ones shipping more, faster, with motion. Animated photos are a shortcut to that. Take it.
Frequently Asked Questions
Image to video AI is a type of generative model that takes a still photo as input and produces a short animated video clip. It adds motion to subjects, backgrounds, camera angles, and even lighting based on a prompt or preset motion style.
Upload your photo to a tool like MagicShot’s image to video feature, pick a motion style or write a short prompt describing what should move, then generate. Free credits let you test the output before committing to a longer render.
MagicShot bundles Kling Omni, Veo 3.1, Seedance 2.0, and Wan 2.6 under one subscription, so you can switch models depending on whether you need cinematic motion, fast turnaround, or product-focused output.
A 5-second clip usually renders in under 2 minutes. Longer clips or higher-resolution outputs take 3 to 5 minutes depending on the model you pick and current server load.
Yes. With features like Motion Control you can specify zoom, pan, orbit, and tracking shots instead of letting the model guess. This is where animated photos start to feel cinematic instead of jittery.