


How to Create Professional Product Photos with AI (No Studio Needed)
- How-to Guides
- 8 min read
- Published: May 19, 2026
- Harish Prajapat
Your product photo is doing more work than you think. It’s the headline, the proof, the closer — all in one image. And if it looks like it was shot on a kitchen counter under a yellow bulb, you’ve already lost the sale.
That’s the brutal part of selling online. People scroll fast. They judge faster.
So here’s a real guide to AI product photography — what it does, how to use it, and where it actually saves you money. No hype.
Why product photos matter (more than you want to admit)
Conversion rates on product pages live and die by the hero image. Studies keep landing in the same range: better photos lift conversions by 30 to 100 percent. Sometimes more. The number depends on your category, but the direction never changes.
Think about your own behavior. You see a $40 candle on Instagram. One brand shows it on a marble countertop with morning light hitting the wax just right. The other shows it on a folding table with a flash glare. Same candle. Same price. You’re clicking the marble one. We all are.
And it’s not just aesthetics. Photos answer questions before customers ask them. How big is it? What’s it made of? Does it look as nice in person? A good shot says yes before the buyer types a single message.
The problem? Studio photography is expensive. A decent product shoot runs $500 to $5,000 depending on the photographer and the scope. For a Shopify store with 80 SKUs, that math gets ugly fast.
This is the gap AI fills.
What AI product photography actually does
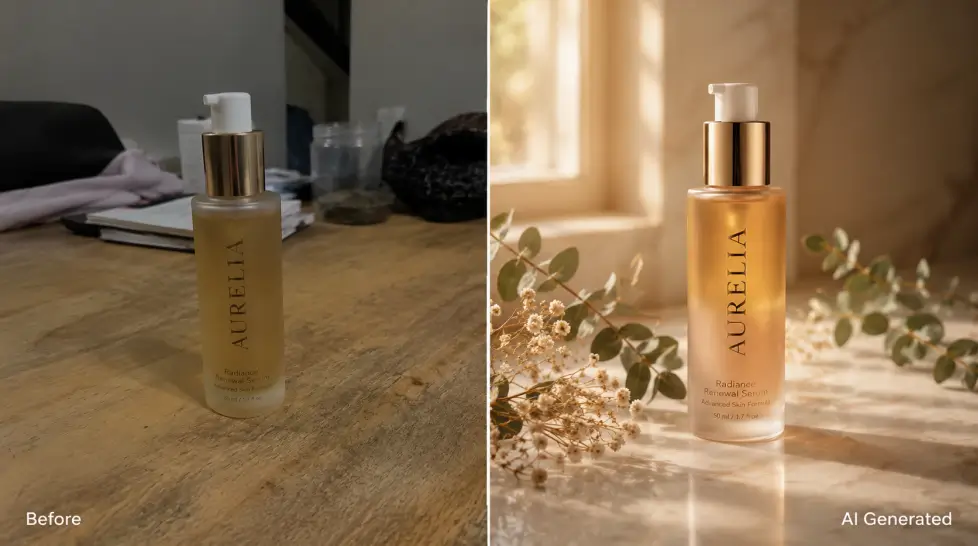
Quick myth-bust first. AI product photography doesn’t invent a fake product out of nothing. Not the good versions, anyway. What it does is take a photo of your real product — even a phone snap on a bedsheet — and put it into a generated scene with controlled lighting, professional backgrounds, and consistent style.
The product stays the same. The world around it changes.
So your serum bottle ends up sitting on weathered concrete with soft window light. Or on a satin sheet. Or surrounded by eucalyptus leaves and morning steam. You pick the vibe. The AI builds the scene.
The better tools also handle:
- Shadow generation that matches the new lighting
- Reflection rendering on glossy surfaces
- Depth of field that makes the product pop
- Multiple angles from one input photo
- Background removal with clean edges
MagicShot’s AI Product Photography tool does all of this in one pass. Upload, prompt, generate. That’s the loop.
The step-by-step (the part you actually came for)
Here’s the workflow I run when I’m shooting a new product. Takes about 15 minutes per SKU if I’m being careful. Less if I’m batching similar items.
Step 1: Take a clean reference photo
You don’t need a real studio. You need:
- A window with indirect light (north-facing if you have it)
- A solid background — white poster board works, so does a clean wall
- A phone camera (newer is better but anything from the last 4 years is fine)
- Your product in focus, centered, not too close to the edges
Avoid hard shadows. Avoid mixed lighting. Avoid clutter. You’re feeding the AI clean information so it can do clean work.
Step 2: Remove the background
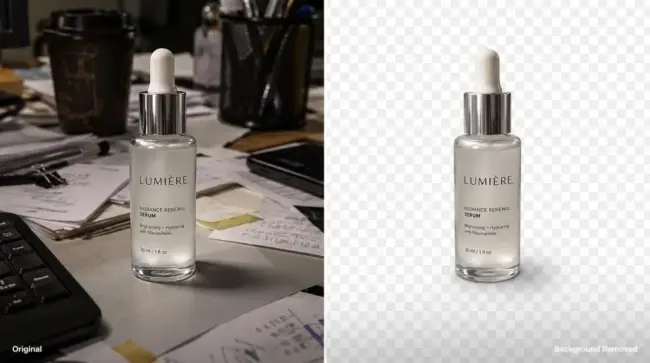
This step matters. The AI needs to know exactly where your product ends and the new scene begins. Run your photo through an AI background remover first. You’ll get a clean cutout with a transparent PNG.
Some product photo tools do this automatically. Some don’t. Either way, starting with a clean cutout gives you better final results. Less weird edge artifacts. Less floating shadow from your old background bleeding into the new one.
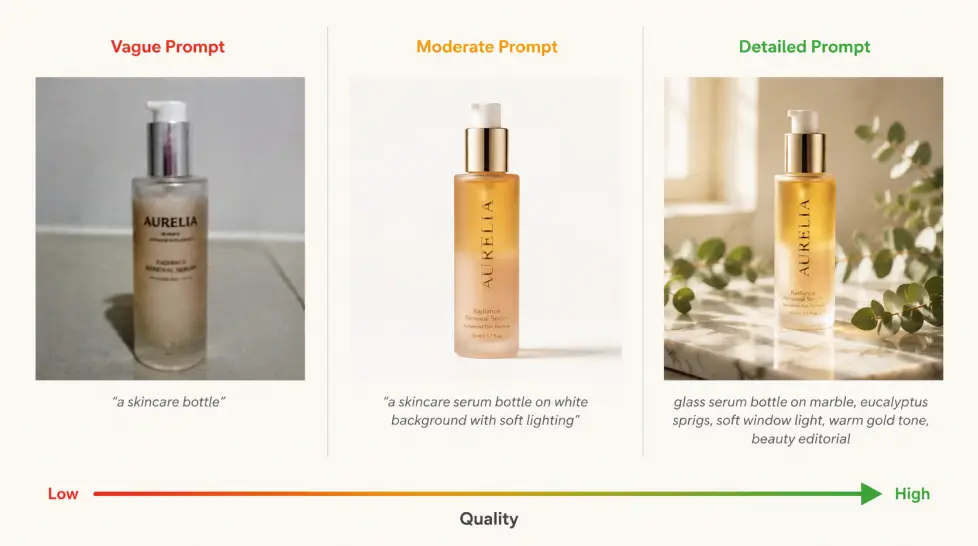
Step 3: Write a prompt that’s specific
This is where most people undershoot. They type ‘product on table’ and wonder why the result looks generic.
Be specific. Like, weirdly specific.
Instead of: ‘serum bottle on counter’
Try: ‘amber glass serum bottle on a cream marble countertop, soft morning light from the left, eucalyptus sprig in the background slightly blurred, shot at 50mm equivalent, shallow depth of field, neutral color grading’
The second prompt gives the AI a real scene to build. The first gives it a coin toss.
Step 4: Generate, review, refine
First generation is usually 70 percent there. Maybe the light is slightly off. Maybe the shadow falls wrong. Maybe the marble texture looks too busy.
Refine and run it again. Most tools let you keep the product locked while you change scene parameters. That’s huge — you’re not regenerating from scratch every time.
Honestly, the first prompt almost never lands perfectly. Plan for 2 to 4 iterations. That’s normal.
Step 5: Upscale and export
Generate at high resolution if your tool allows it. If not, run the output through an AI upscaler before exporting. Amazon wants at least 1600px on the longest side for zoom functionality. Shopify renders cleanest at 2048px square. Instagram wants 1080px minimum but 1440px gives you breathing room.
Best backgrounds by platform
Different platforms reward different aesthetics. What works on Instagram bombs on Amazon. And vice versa. Here’s the breakdown.
Amazon
The main product image has to be pure white. RGB 255,255,255. No exceptions in most categories. This is non-negotiable.
But your secondary images (slots 2-7) are where you can breathe. Use AI to create:
- Lifestyle scenes showing the product in use
- Scale shots with a hand or recognizable object
- Detail crops with subtle background context
- Infographic-style shots with the product on neutral surfaces
Keep colors muted. Amazon shoppers are buying utility. Loud backgrounds distract.
Shopify
Your store, your rules. Most successful Shopify brands stick to a consistent palette across all product photos. Pick 2 or 3 background styles and use them religiously.
Cream and beige tones convert well for beauty and wellness. Concrete and stone work for tech and home goods. Wood textures suit food and lifestyle products. The point isn’t which one you pick — it’s that you pick and stick with it.
If you want a deeper walkthrough of what works for online stores, the e-commerce product photo guide covers the conversion-tested setups in more detail.
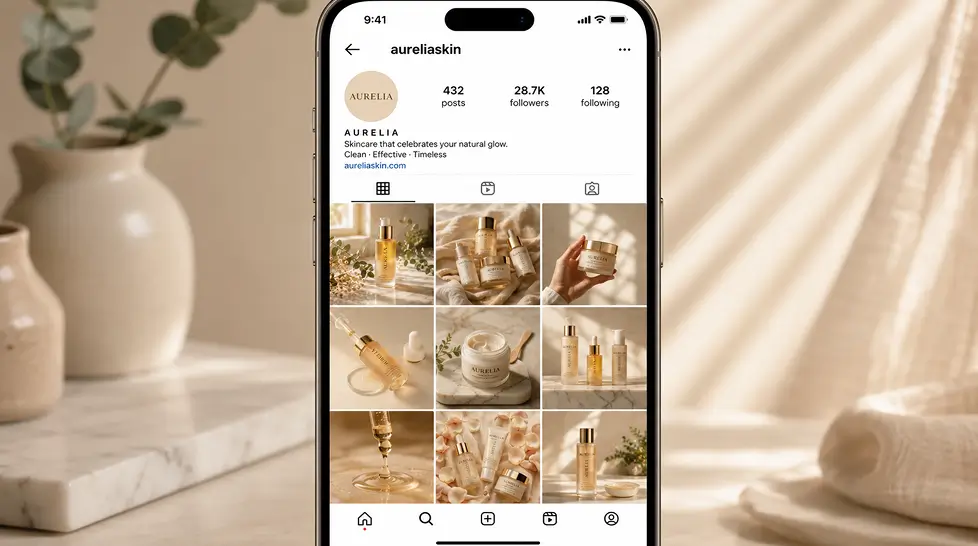
Instagram rewards mood. Atmosphere. Story.
This is where AI really shines. You can generate scenes that would cost thousands to stage in real life. A perfume bottle on a windowsill in Paris. Sneakers on a wet city street at golden hour. A candle in a Japanese ryokan. The constraints melt away.
Just remember the algorithm rewards consistency. Pick a visual identity and let AI execute it across your whole grid.
Multiple angles without reshooting
This is probably the single biggest time-saver in AI product photography. Once you have a clean product photo, you can generate the same product from different angles without ever picking up the camera again.
Front. 3/4 view. Top down. Side profile. Macro detail on the texture.
The Multiple Views feature handles this from a single input. You upload one shot, it generates the rest. Saves you from rotating products under a light for an hour straight, which — speaking from experience — is genuinely tedious work.
One caveat. Multiple-angle generation works best on products with clear geometry. A box, a bottle, a shoe, a chair. Things with simple symmetry. Complex objects (think electronics with weird ports and asymmetric details) sometimes get fuzzy on the angles the AI hasn’t ‘seen.’ Test it before committing.
What about 360-degree spins?
Some tools generate enough angles to stitch into a 360 spin. The quality varies. For premium products where buyers expect a full rotation (jewelry, watches, sneakers), I’d still shoot real footage. For everyday items, AI-generated multi-angle shots are plenty.
Background removal — the unsung hero
You’d think background removal is a small step. It’s not. It’s the foundation everything else sits on.
A bad cutout shows up in three places:
- Weird edge halos around the product in the new scene
- Lost detail where hair, fabric, or transparency get chewed up
- Mismatched lighting because the original shadow came along for the ride
Old-school background removal needed Photoshop and a steady hand. Modern AI handles it in one click — and handles transparency, fur, fine edges, and complex shapes better than humans with pen tools used to.
For pure background removal (you just need a clean PNG with no background), use a dedicated tool. For full product photography with new backgrounds, the removal happens inside the workflow automatically.
Either way, audit your edges before you publish. Zoom in. If you see fringing or weird halos, regenerate. Don’t ship sloppy cutouts. Buyers notice.
Common mistakes that kill AI product photos
I’ve made all of these. Sharing so you don’t have to.
Over-stylizing the scene. The product should be the hero. Not the marble. Not the eucalyptus. If your eye goes to the background first, the prompt is too busy.
Inconsistent lighting across your catalog. If half your products have warm afternoon light and the other half have cool morning light, your grid looks chaotic. Pick a lighting style and stick with it.
Wrong aspect ratio for the platform. Square for Instagram feed. 4:5 for Instagram portrait. 1:1 for Amazon. 16:9 for hero banners. Generate at the right ratio from the start instead of cropping later.
Ignoring scale. Without context, customers can’t tell if your product is 2 inches or 2 feet. Add a hand, a familiar object, or use lifestyle shots to anchor scale.
Forgetting the in-use shot. Product on a pretty surface is fine. Product being held, worn, used, opened — that’s what drives purchases. Don’t skip the contextual shots.
Quick comparison: studio vs AI
| Factor | Traditional Studio | AI Product Photography |
|---|---|---|
| Cost per shot | $50 to $200+ | Cents to a few dollars |
| Time per shot | 10 to 30 minutes | 30 to 60 seconds |
| Background variety | Limited to physical sets | Unlimited |
| Reshoots | Schedule another day | Regenerate in a minute |
| Best for | Hero campaigns, brand films | Catalog, social, ads, A/B testing |
This isn’t a ‘AI replaces photographers’ argument. For top-of-funnel brand work, hire a real photographer. For the other 95 percent of shots you need — the catalog filler, the seasonal updates, the platform-specific resizes, the ad creative variants — AI wins on speed and cost every time.
Final thought
The honest reason most small brands have bad product photos isn’t laziness. It’s the math. Shooting 60 SKUs professionally costs more than they earn in a month. So they settle. Phone snaps. Awkward angles. Yellow bulbs.
AI product photography removes the math problem. You can shoot your whole catalog in a weekend. You can test five different aesthetics before committing to one. You can update every photo when the seasons change.
That’s not a magic trick. It’s just a faster tool. Use it.
Frequently Asked Questions
Yes, sort of. Most AI product photography tools offer a free tier with limited credits — usually enough to test a few shots before you commit. MagicShot includes free generations on signup so you can run your actual product through it before paying. The catch with most free options is watermarks, lower resolution, or a queue. For one-off shots, free works. For a full catalog, you’ll want a paid plan.
For lifestyle and secondary images, absolutely. Amazon’s main listing image still has to be a true white background shot of the actual product, and the rules are strict about not adding props or text. So use AI for your 2nd through 7th images — the lifestyle scenes, the in-use shots, the contextual stuff. That’s where AI saves the most time and money.
Around 30 to 60 seconds per image once you have your product photo uploaded. The first one takes longer because you’re testing prompts. After that, you can batch through 20 to 30 shots in under an hour. Way faster than a studio day.
It should. Tools like MagicShot’s AI Product Photography preserve your actual product and only generate the scene around it. The label, shape, color, and details stay accurate. What changes is the background, lighting, and surrounding context. If the product itself looks different, the tool is doing it wrong.
Yes. Shopify has no rule against AI imagery. Same with most marketplaces except a few specific Amazon main-image categories. You’re free to use AI photos for product pages, banners, collection covers, social ads, and email graphics. Just be honest about color, size, and what the product actually does.